Most of the programs on your computer, including your Operating System need access to the internet to download important updates. Some apps like your Antivirus need to download malware definitions regularly and may not function properly if you don’t have internet access.
Apps like Mail or the Web Browsers are almost useless without access to the internet.
These apps access the internet in the background to download important updates, definitions and security patches. However, some apps exploit your internet connection, like bloatware or certain apps and games which use the internet to display audio/video adverts. Apps nagging you to upgrade to a newer version or automatically downloading unnecessary updates in the background.
If you want to block access to the internet specifically for such rogue apps then you can use Windows Firewall to create an outbound rule which won’t allow these apps to access the internet in the background.
How to Block access to the Internet using Windows Firewall
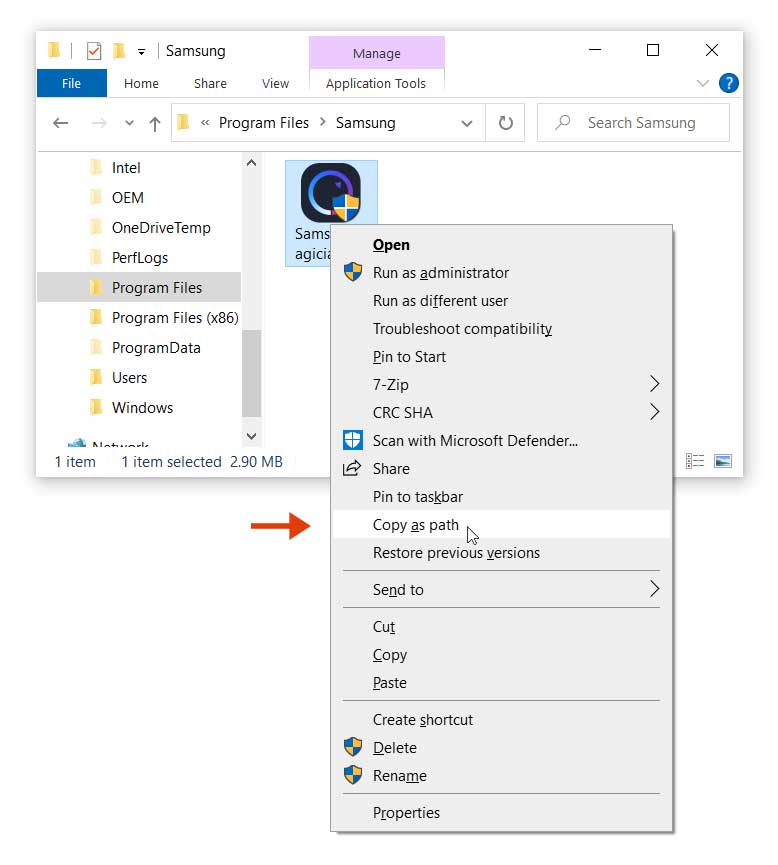
Open the file location of the application that you want to block. The program file may be located in one of the following paths.
C:\Program Files (x86)C:\Program FilesYou can use Resource Monitor in Windows 10 to get a list of programs which are currently accessing the internet. Simply search for the Resource Monitor app in taskbar search. Inside, the app, select the Network tab. The Network tab would show you a list titled “Processes with Network Activity” with all the apps which are currently using your internet connection.
You would have to locate the .exe file of the installed app which you want to block. After locating the program file, right click on it after pressing and holding the Shift key on your keyboard. From the context menu, select Copy as path to copy the path of the program file.
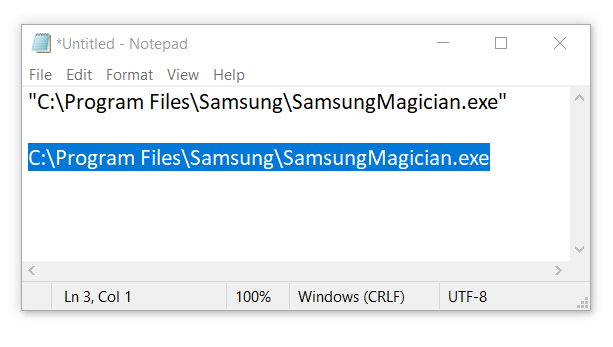
Now open the Notepad or any text editor and paste the file path. Remove the opening and closing quotations from the path. Copy this path to your clipboard.
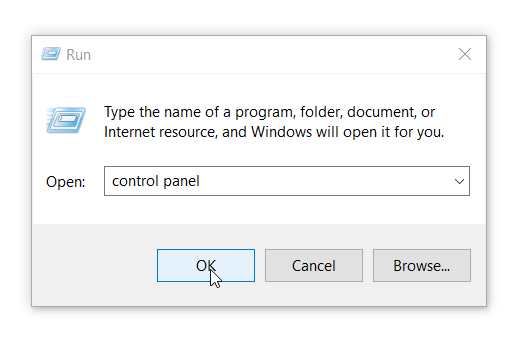
Press the shortcut Windows + R to open the Run dialog. In the Run dialog type, control panel and hit Enter.
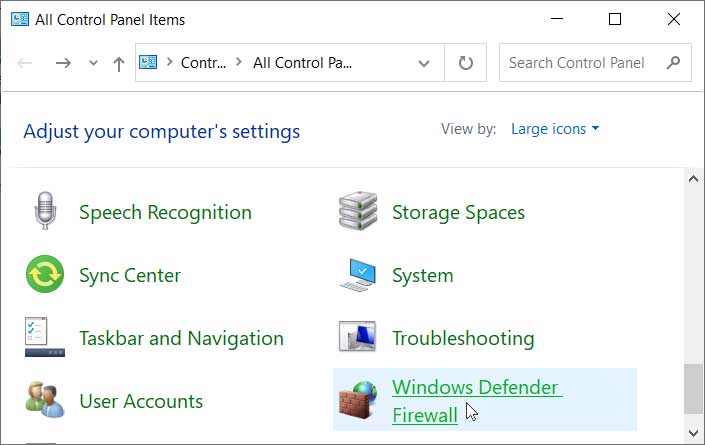
You would open the old control panel in Windows 10. Search for Windows Defender Firewall. Alternatively, simply search for Windows Defender Firewall in the taskbar search box.
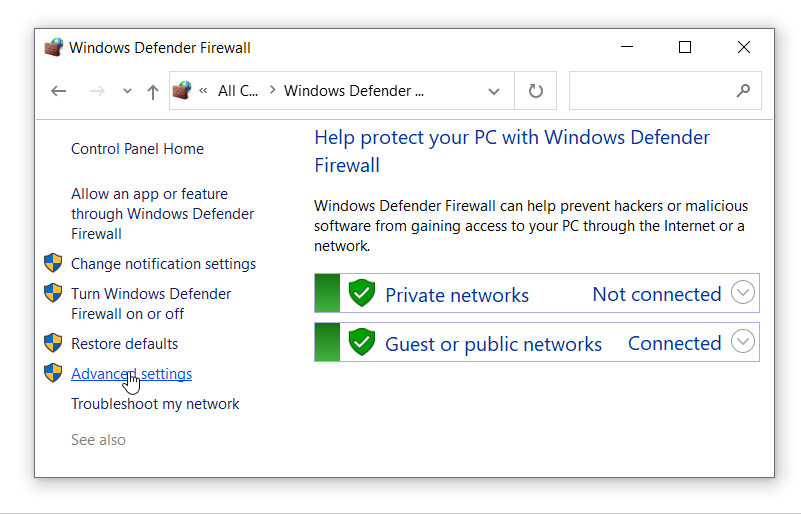
In the Windows Defender Firewall window, click on Advanced Settings.
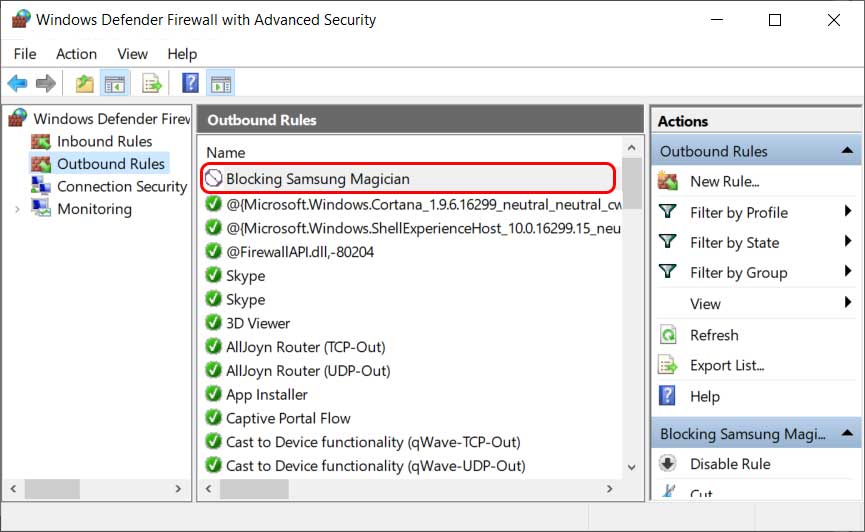
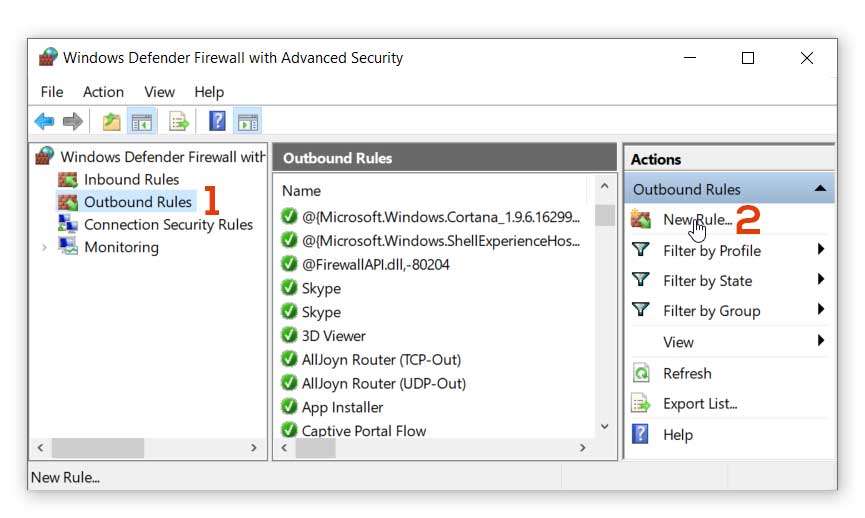
In Windows Defender Firewall with Advanced Security window, click on Outbound Rules in the left panel. Then, click on New Rule..
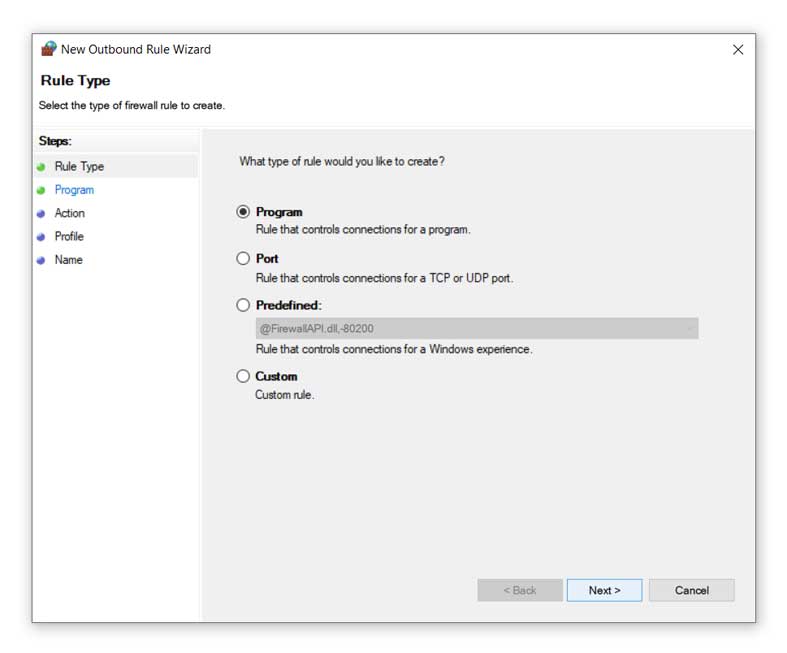
In the New Outbound Rule Wizard, Confirm that the Program option is selected. Click on Next.
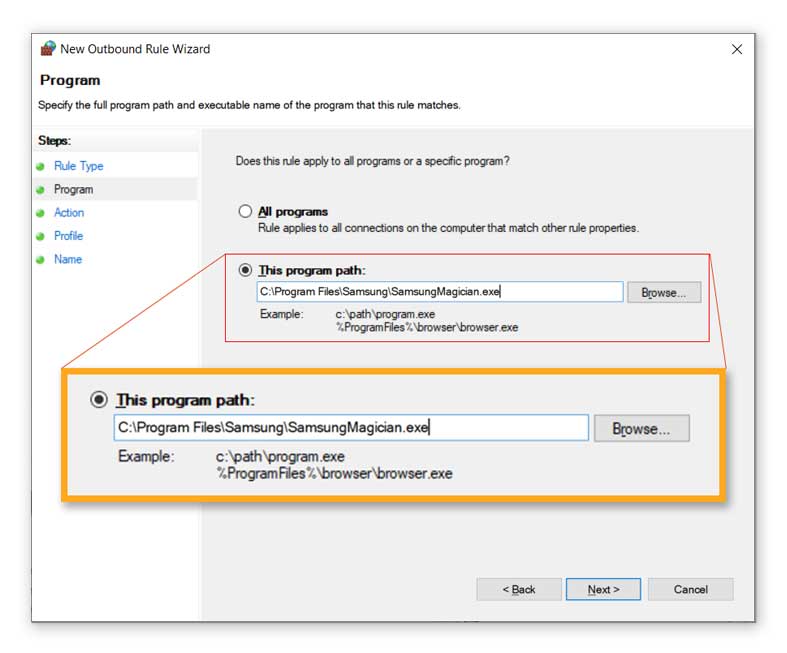
In the program screen, select the This program path option and then enter the path of the file which you have copied in the notepad and click on next.
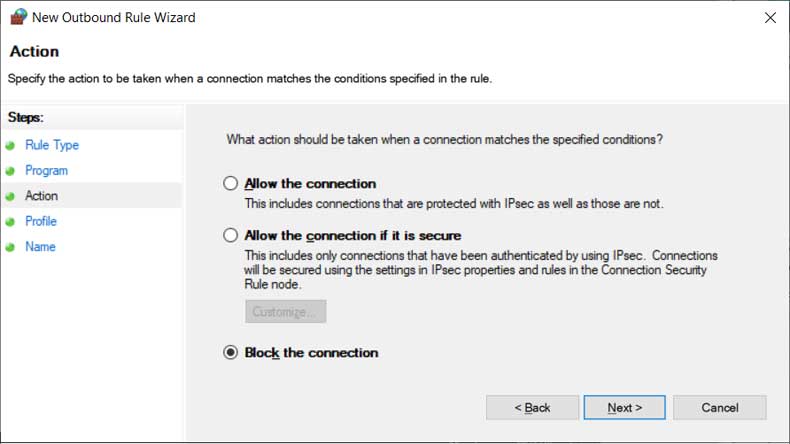
In the Action screen, select the Block the connection option if it’s not already selected and click on next.
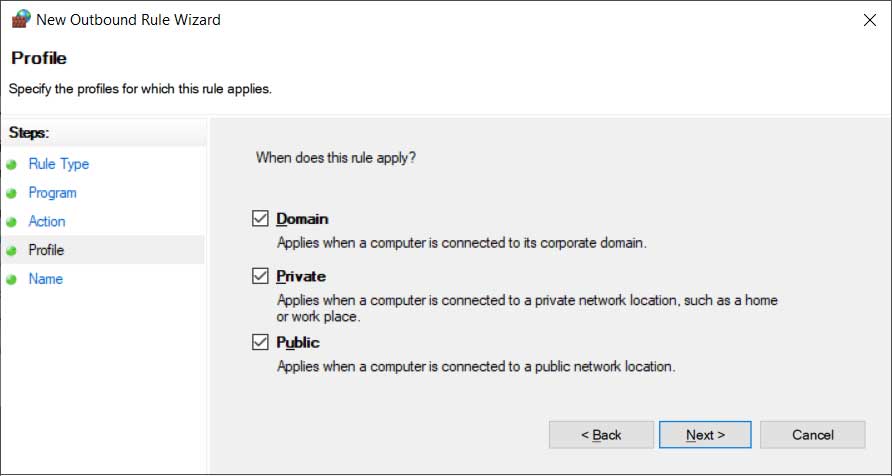
On the Profile screen you have three checkboxes. Check all the checkboxes, if they are not already checked. This means that the program will be totally blocked from accessing the internet. Click next.
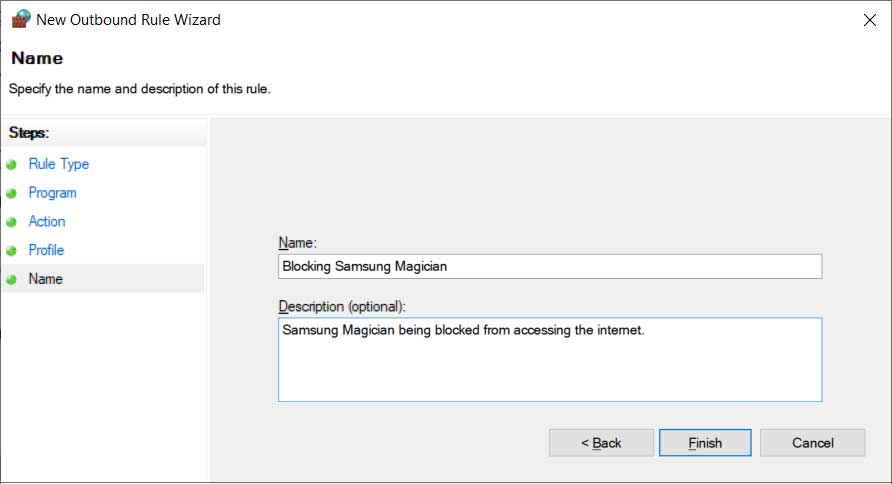
On the Name screen you would have to give a name to your Outbound Rule. Give it any name which would help you to recognize it later. For example, Blocking <app name> or <app name> blocked. Then enter a brief description or leave it empty, as it is optional. Click on the Finish button.
You have created the Outbound Rule to Block the app from accessing the internet.