
Alignment is one of the key principles or basics of graphic design. Appropriate alignment creates balance and gives a composite structure to different elements of your design, improving its overall visibility.
Illustrator has many predefined tools for aligning the different elements of your artwork. You can align objects along their left, right, top and bottom edges. You can even align objects to the edges of your artboard.
Moreover, the Align panel also offers tools to distribute the spacing between different elements in your artboard. You can use it to place objects side by side with even spacing in between them.
How to use the Align Tools in Illustrator?
You can access the Align Panel by pressing the Shift + F7 shortcut. Alternatively, you can go to Window > Align to open the Align Panel.
In the Align Panel you get the Align Tools for alignment and the Distribute tools for managing the spacing between the elements.
Align Tools can be used in three modes. These are Align to the Artboard, Align to Selection and Align to Key Object mode. Align to Selection mode is the most relevant one which you would be using the most.
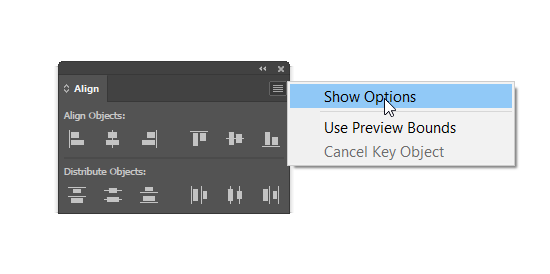
So, first of all open the Align Panel by either pressing Shift + F7 or go to Window > Align, then click on the tiny hamburger icon in the top right corner and select Show Options.
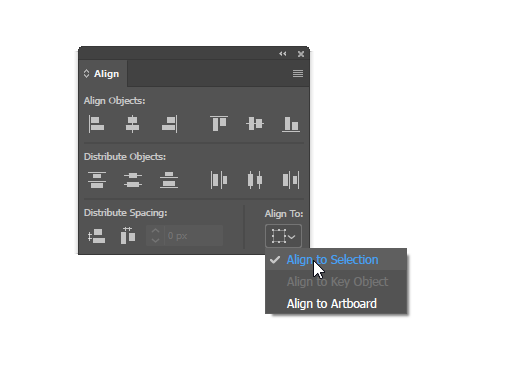
Click on the down arrow under Align To and then select Align to Selection, if it’s not already selected.
Here is the explanation of the different tools and their functions, in the Align to Selection Mode.
Horizontal Align Left
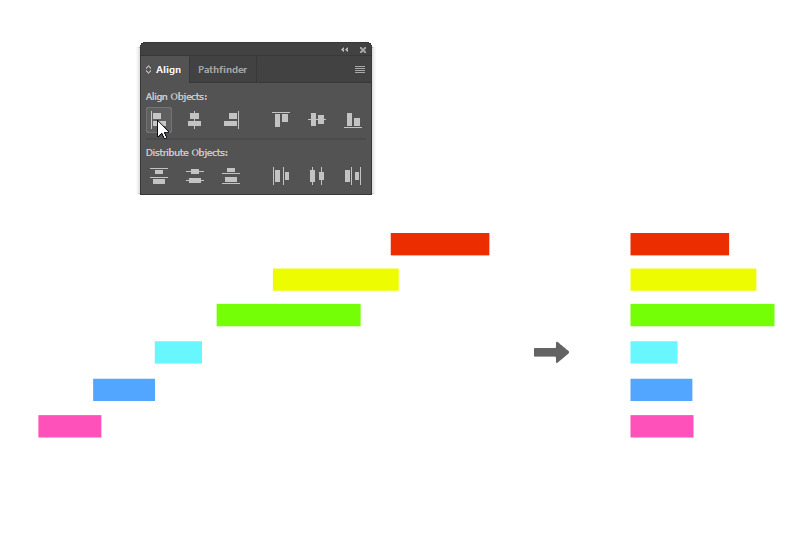
This tool would align the selected objects along the left edge of the leftmost object in your selection. You have to select all the Objects you want to align, with the selection tool (V) and then click on Horizontal Align Left in Align panel.
Horizontal Align Center
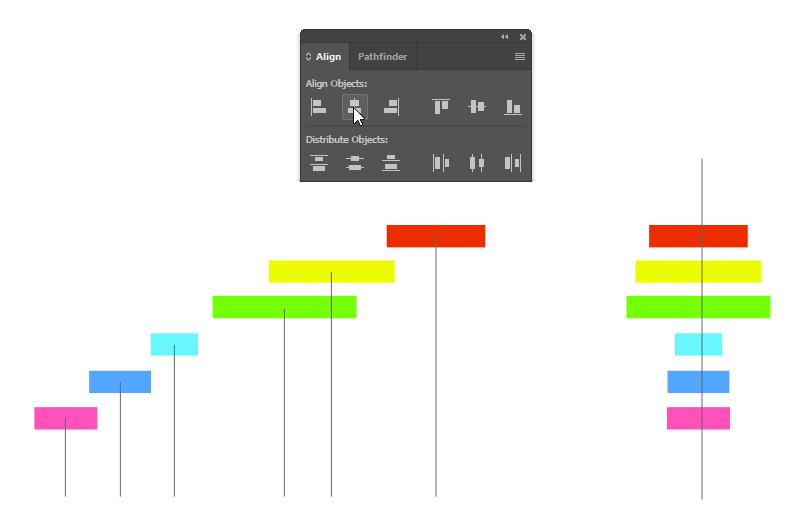
This would align the objects in your selection using their central point. As you can infer from the top image, that the centers of all the selected objects moved horizontally along the x axis (↔) to align in a straight vertical line. The lines were added later to demonstrate the functionality of this tool.
To use this tool, you have to select all the objects with the selection tool (v) and then click on Horizontal Align Center to align them.
Horizontal Align Right.
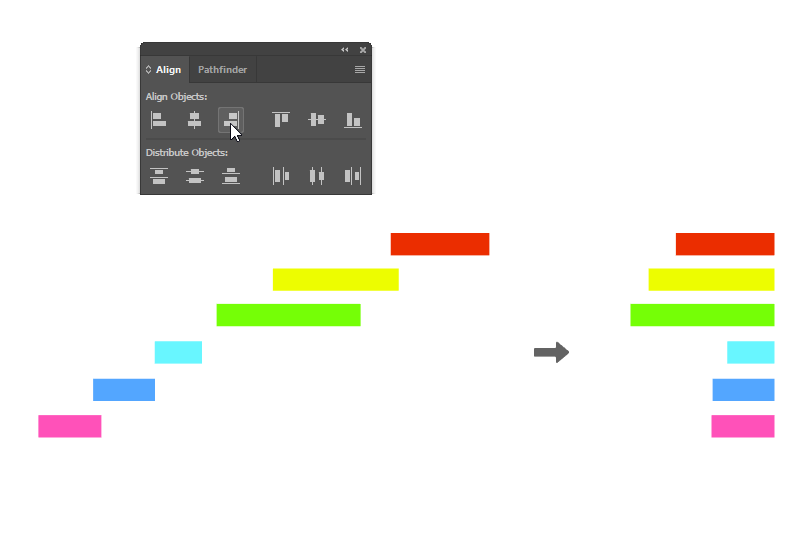
This tool is the exact opposite of the Horizontal Align Left Tool. This would align the selected objects along the right edge of the right most object in your selection.
Vertical Align Top
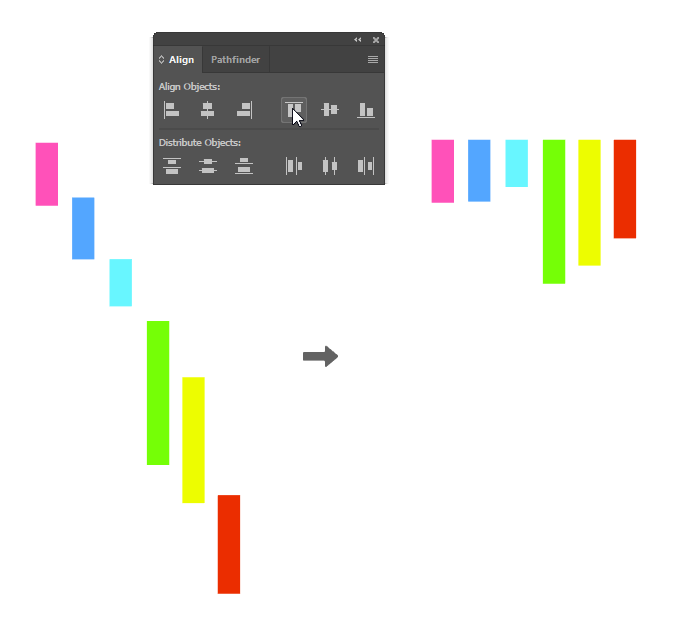
Vertical Align Top would align all the objects in your selection along the top edge of the topmost object. The objects move vertically upwards and align at the top.
Vertical Align Center.
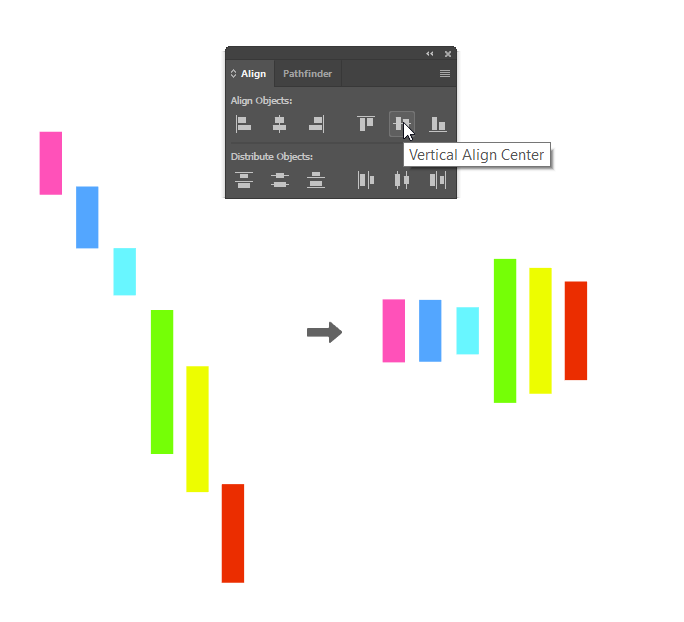
This would move the central point of all the objects in your selection, vertically along the y-axis(↨). The centers of the selected objects would move vertically to align in a straight horizontal line.
Vertical Align Bottom
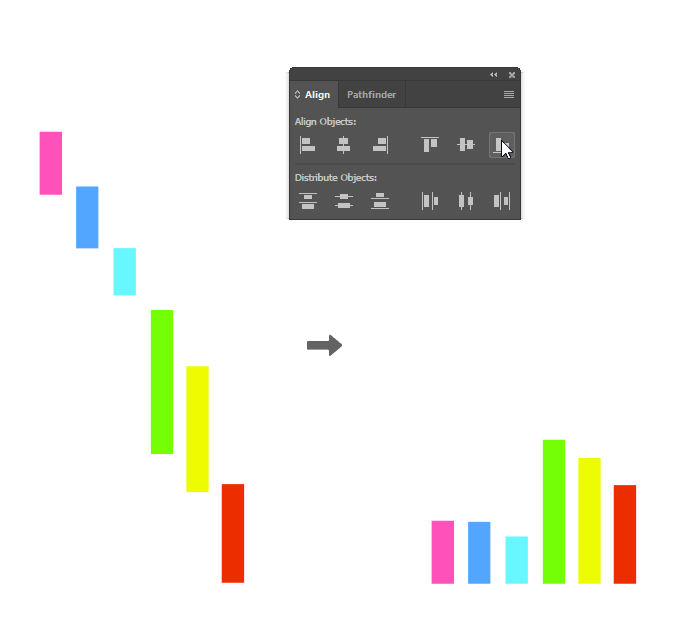
This tool behaves in the exact opposite way of the Vertical Align Top Tool. All the selected objects would align with the bottom edge of the bottom most shape of the selection.
Distribute Tools
The Distribute tools in the Align panel are used for controlling the space or the distance between two or more objects. The Distribute tools and their functions are explained below.
Vertical Distribute Top
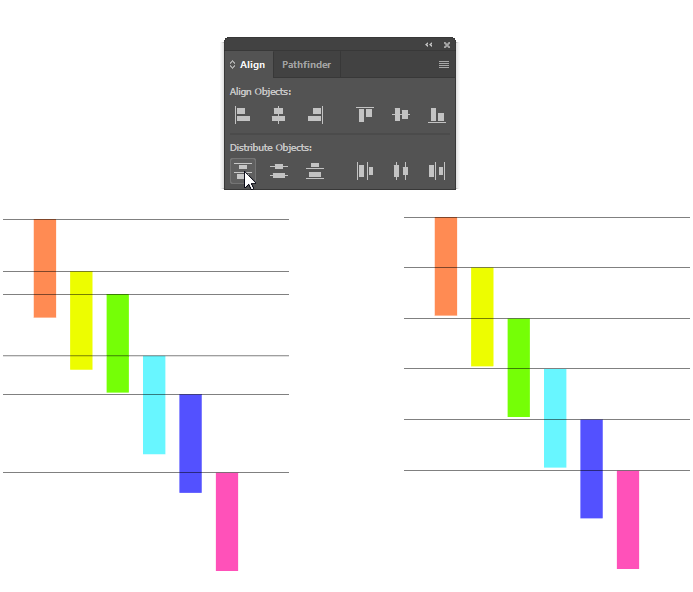
This tool is used to evenly distribute the spacing or distance between the top edges of all the shapes in your selection. The image in the top would help you to understand the functionality of this tool in a better way.
The lines have been added to demonstrate that the spacing between the top edges of the shapes on the left is not even or uniform. Vertical Distribute Top tool, fixes this and places the objects at equal distance from each other.
Vertical Distribute Center
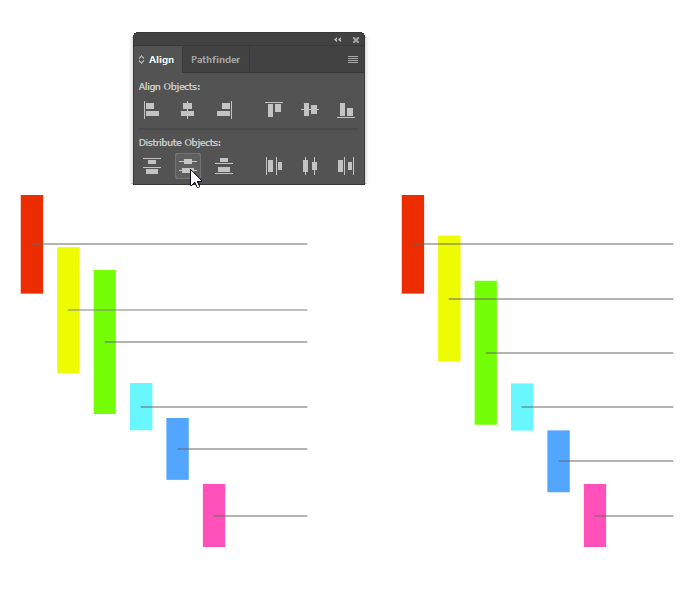
This tool works in the exact same way as the Vertical Distribute Top tool but instead of using the top edges; it uses the center of the objects to distribute the spacing in between.
Vertical Distribute Bottom
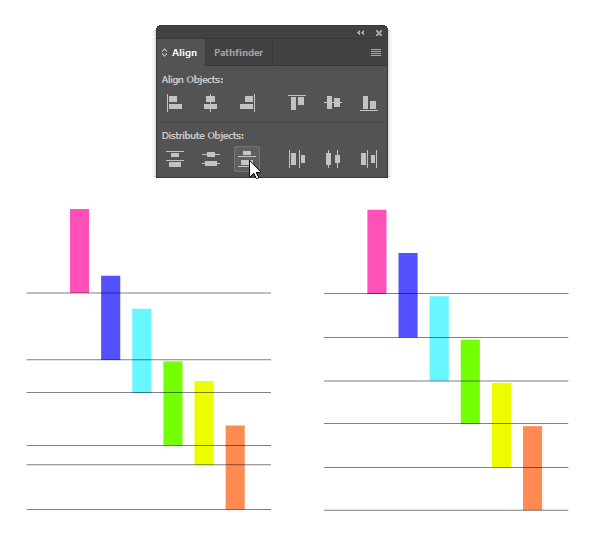
This tool would use the bottom edges of the shapes to evenly distribute the spacing. It works in the exact opposite way of the Vertical Distribute Top tool.
Horizontal Distribute Left
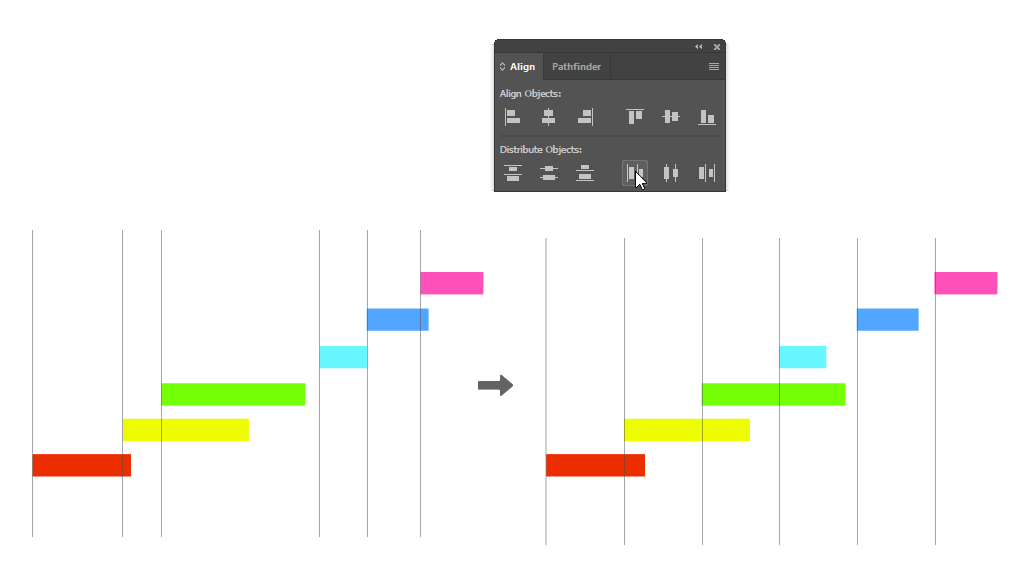
Horizontal Distribute Left would use the left edges of the shapes in your selection for distributing the spacing. It distributes the spacing by moving the shapes along the x-axis (↔) or horizontally.
Horizontal Distribute Center
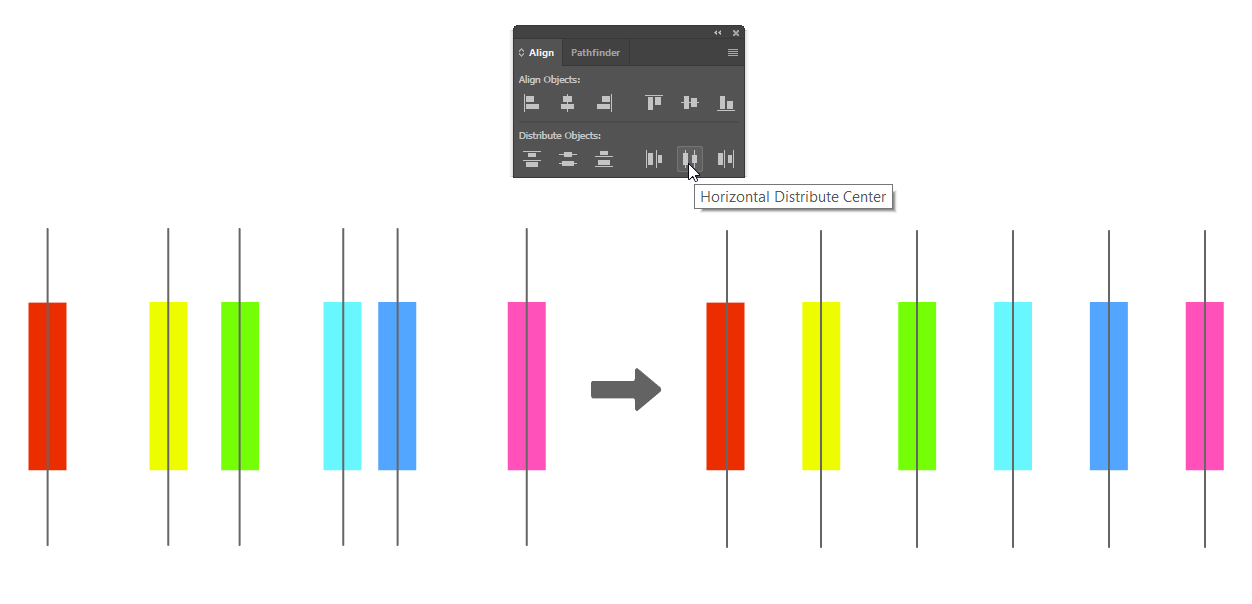
This would use the central point of the shapes to evenly distribute the spacing between the shapes.
Horizontal Distribute Right
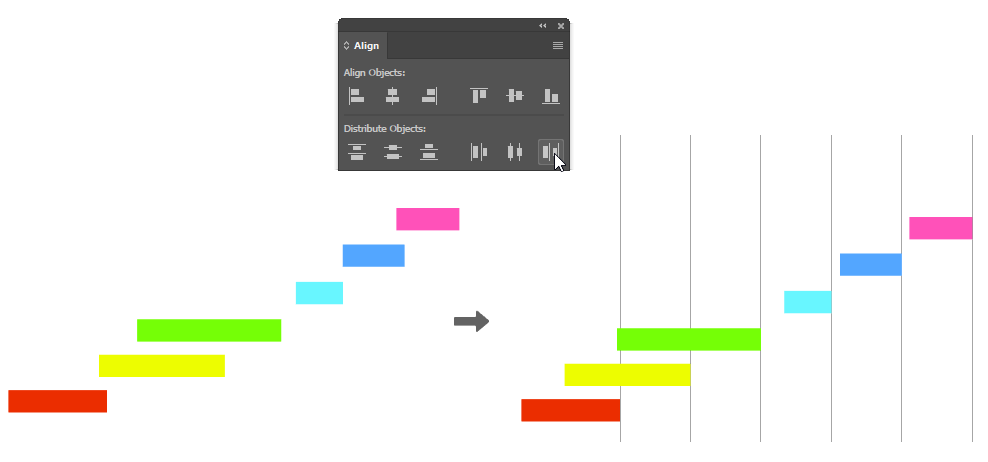
This would use the right edge of the shapes for distributing the spacing in between.
So, these were the tools for aligning and distributing the spacing between the objects. You can use other modes like Align to Key Object mode where you have to specify a key object in your selection. The rest of the objects would align to your key object instead of aligning with the default object.
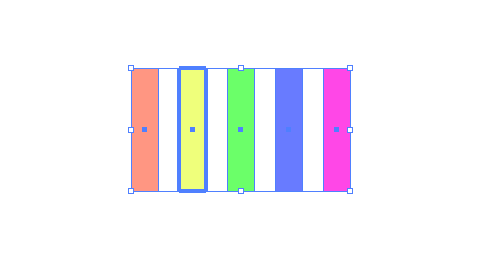
To specify the key object, you have to select all the objects with the selection tool (v) and then click on the object which would act as the key element. Then click on your desired tool in the Align panel.
Practice with all the modes and tools to better understand their functionality.