Do you want to combine multiple audio files to create a single unified file? You can either use proprietary audio editing software like Adobe Premiere Pro or Audition or you can use any online tool or app for combining the files.
If you don’t have access to any proprietary app and do not want to upload your audio files to any online site due to privacy concerns; then you can use freeware like Audacity. It is perfect for basic audio editing and mixing.
Audacity is a free, open source audio editing software available for Windows, macOS and Linux based systems. Its developers have released it under GNU general public license which allows you to run, share or modify the software as per your liking.
Moreover, you can also use the Command Prompt in Windows computers to combine MP3 files. Click on the following link for detailed instructions.
RELATED: How to Join multiple MP3 files using Command Prompt in Windows
Combining MP3 files Using Audacity
You can download Audacity from its official site. Use the link given below.
Open Audacity after you finish the installation and follow the steps given below.
Step 1
The first thing you should do is to import the files you want to be combined into Audacity. To Import the files, click on File > Import and select Audio (Ctrl+ Shift + I)
In the Import dialog, navigate to the folder where the audio files are located. You can select multiple files at once by pressing and holding the Shift key and then clicking on the files.
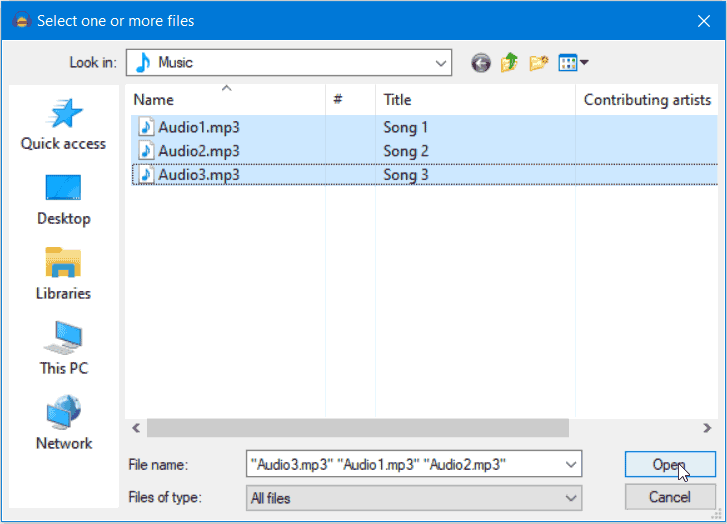
Click on Open after selecting all your files.
Step 2
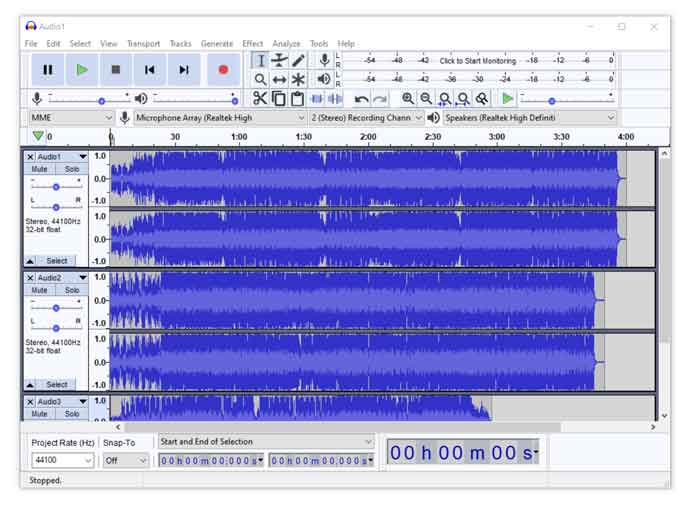
Audacity opens the files in the waveform display view with a separate control panel for each track. There are two waveforms, displayed for each track separately, with the top one showing the right channel waveform and the left channel shown in the bottom.
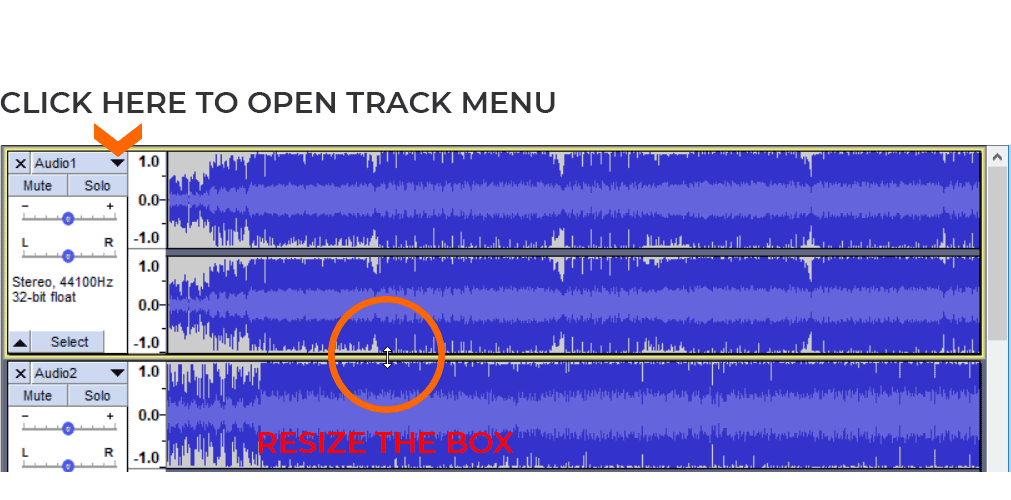
You can resize the waveform display box of any track by selecting and dragging the bottom edge. You can also access the track menu by clicking the dropdown in the track control panel at the left. You can use the track menu to move a track up or down in the track order.
Step 3
Before combining the files you may want to remove the silent parts at the ending of each track so that they do not appear in the combined file. You can skip to the next step if you don’t want to remove the silent parts.
To trim the silent parts, zoom into the waveform box by pressing Ctrl + 1 shortcut key. You can also use the Ctrl + 3 shortcut to zoom out.
Press Ctrl + 1 shortcut at least four times or until you can clearly see the silent parts of the waveforms in detail. Go to the end of a track’s waveform by using the horizontal scroll bar at the bottom of Audacity window.
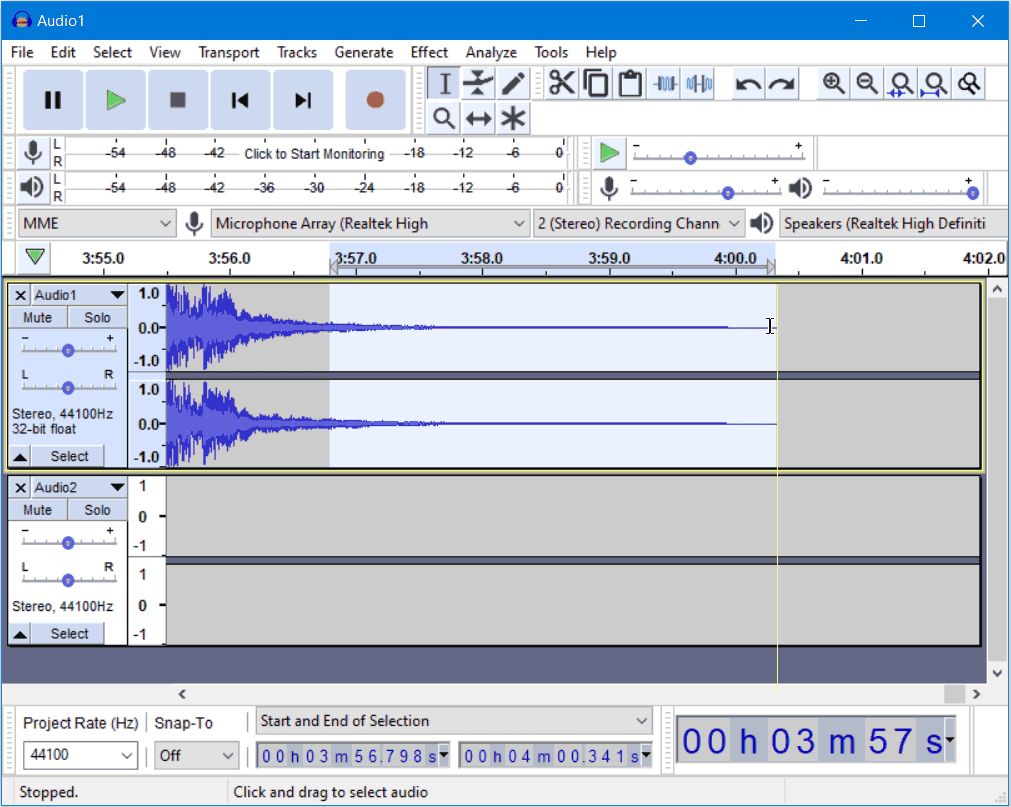
Then click on the Selection Tool or Press the F1 shortcut key.

With the Selection tool active, click at the beginning of the silent part; the region where the waveform is flat with no peaks. Drag till the end of the track till a yellow vertical line appears.
Press the DEL key on the keyboard to delete the selected portion of the audio track. Do this for all the individual tracks to remove their silent parts.
Step 4
After removing the silent parts we will align the waveforms of all the tracks from end to end to create a single unified waveform and finally render it to create the final track.
Select all the tracks by pressing the Ctrl + A shortcut key. Then click on Tracks in the menu. Go to Align Tracks > Align End to End.
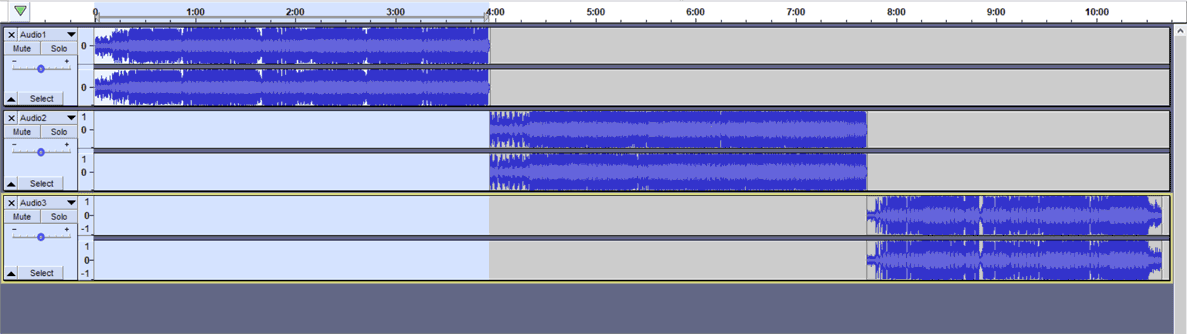
This will put the beginning of the second track at the end of the first and so on.
Step 5
Now, we would mix and render the tracks together to create a single track and its waveform.
Press Ctrl + A shortcut to select all the tracks and then click on Tracks in the menu. Then, select Mix > Mix and Render.
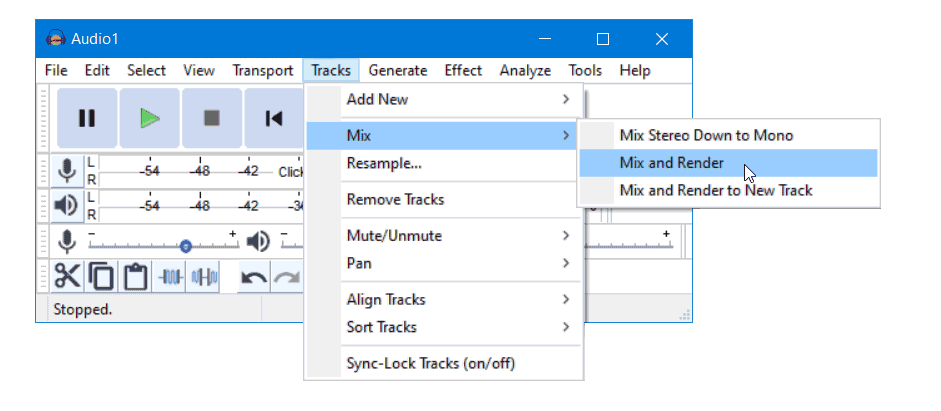
Audacity may take a few seconds to render the track. It would finally display a single combined track and its waveform. This is your combined track file.
Step 6
Your track is now ready to be saved as a combined audio file. You can click on the Play button in the toolbar to hear the final render before saving. Reduce the system volume before playing as Audacity would use the default system volume.
To save the track Go to File > Export > Export as MP3. Make sure you have stopped the playback by clicking on the Stop button before saving as the Export option is disabled when the track is playing.
In the Export Audio dialog select the location and change the file name.
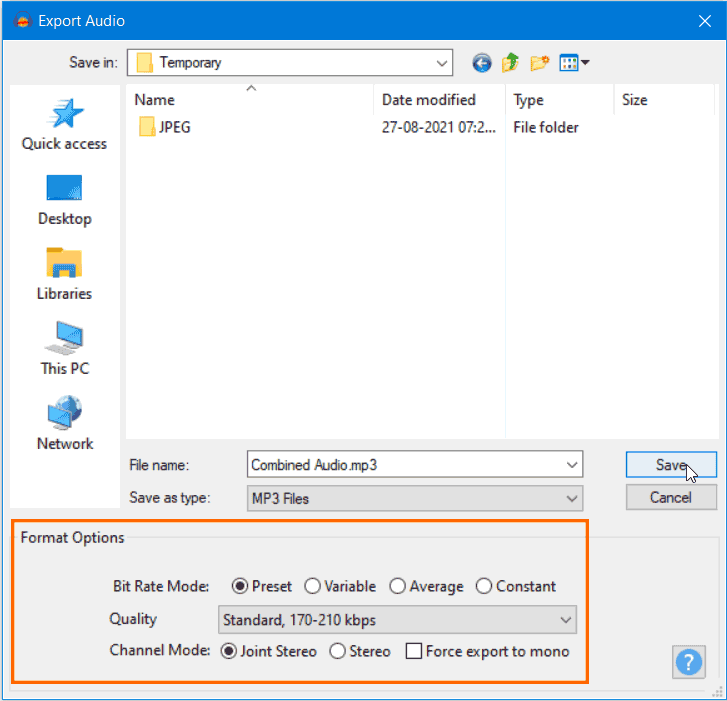
The Export Audio Dialog has Format Options at the bottom. Leave the Bit Rate Mode at Preset. By default the Quality is set to Standard, 170-210 kbps; you can change it to Insane ( 320 kbps) if you want a high quality audio file. For Channel Mode Audacity chooses Joint Stereo by default but you can change it to Stereo if you want to save the left and right audio channels separately.
However, Changing it to Stereo won’t make any difference in the quality of the audio if both the channels in the original audio file have the same audio data. You should choose Joint Stereo if both the channels in your original audio files have similar data. Also, Changing the Quality to Insane and choosing Stereo or separate audio channels would lead to a bigger file size.
Finally, click on Save to save the combined audio file.
Before saving the file, Audacity would show you the Edit Meta Tags dialog. You can change the meta data like Artist Name, Title and Genre or leave them at default values.
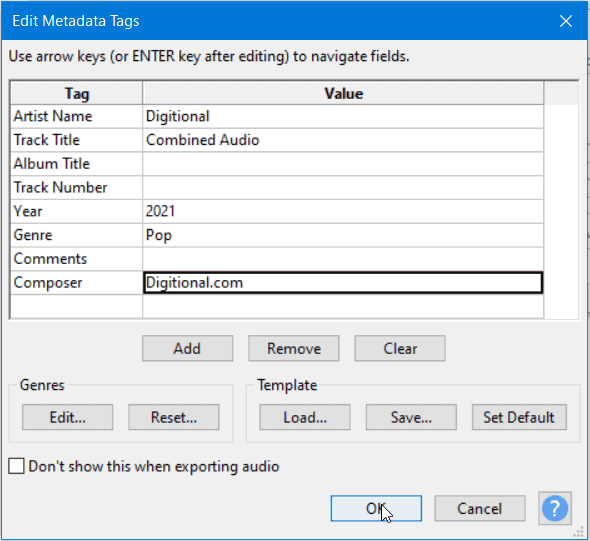
Finally, Click on OK to Export and Save the file.
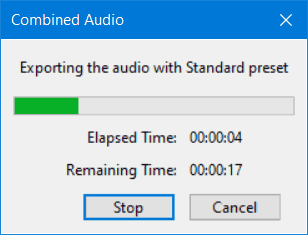
Audacity would take a few seconds to Export the file which would appear on the location you selected earlier.
RELATED: How to UnSend a Sent Email in Gmail and Outlook
RELATED: How to Access your Phone’s WhatsApp from a Desktop Browser