
VLC player needs no introduction and is perhaps the most popular free media player. It supports more video formats than some of the proprietary video players out there.
It is perhaps the only video player which offers a wide array of features and customization. One of these is the Screen Video capture feature which lets you record your desktop which would be saved as an MP4 video file.
If you have VLC player installed on your PC then you don’t need another screen recorder application. You can use VLC to record High Definition HD videos of your active display along with all your mouse movements.
The Video Capture is inbuilt in VLC and you don’t have to install any extra add-on or plugin to activate this feature. If you have the latest version of VLC player installed on your PC then you are good to go.
How to Record your Screen with the VLC media player?
Step 1
Open VLC player. Go to Media Menu and Click on Convert/Save. You can also press the Shortcut Ctrl+ R to open the Convert Window.
This will open the Open Media Window. In Open Media window, select the Capture Device tab.
In Capture Device tab, Select Desktop from the drop-down box next to Capture mode. On changing the Capture mode to Desktop, it would show all its associated settings below.
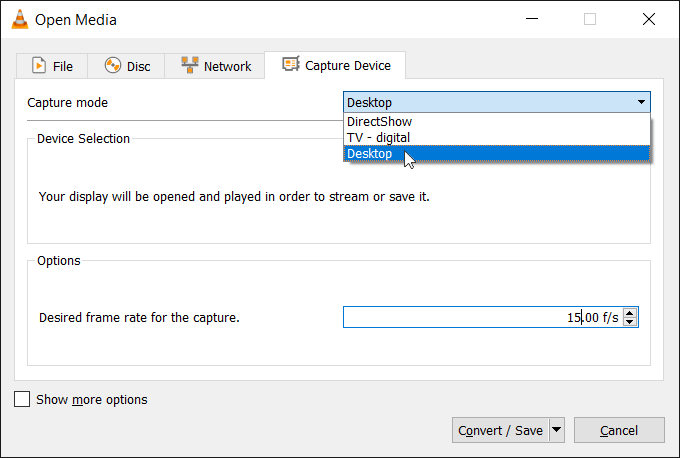
In the box next to, Desired frame rate for the capture, enter frame rate of 15.00 f/s.
Note: You can also enter frame rates of 20, 25, 30 or 60 fps but a higher frame rate would need more processing power and would lead to a bigger video file size. However, a higher frame rate would result in a smoother video.
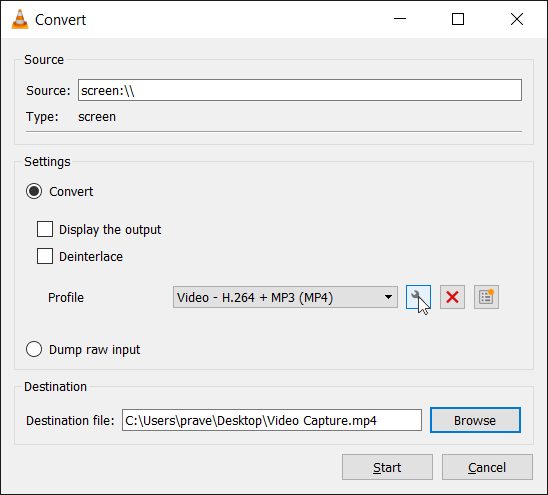
After, entering the frame rate click on the Convert/Save command button. This will open the Convert window.
Step 2
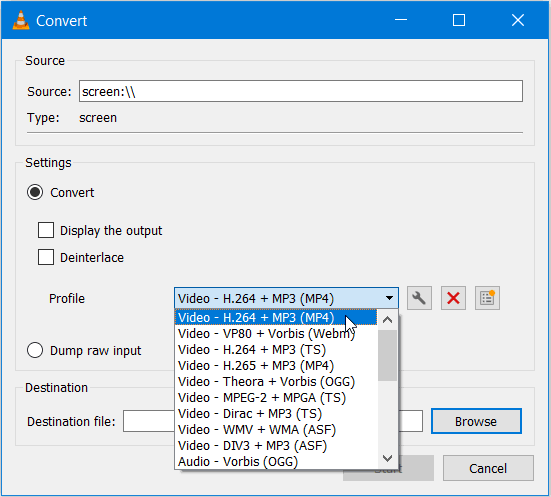
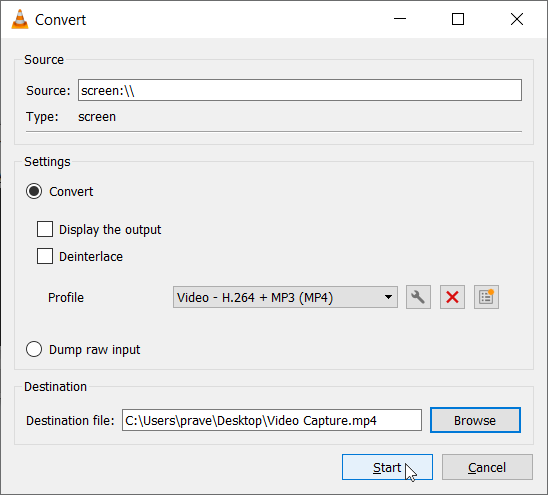
In Convert window, click on the drop-down next to Profile and select Video - H.264 + MP3 (MP4) option.
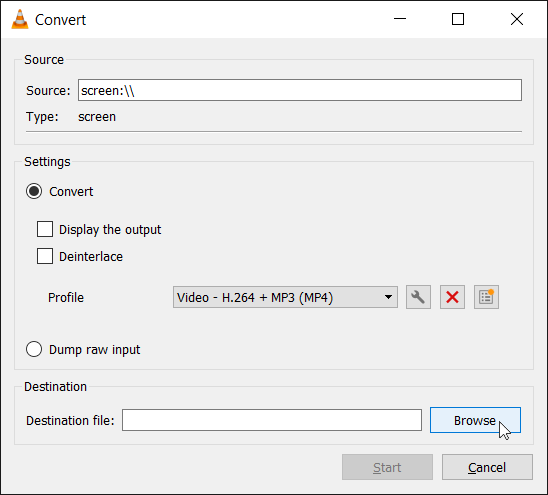
Next, click on Browse to set the Destination file, name and location.
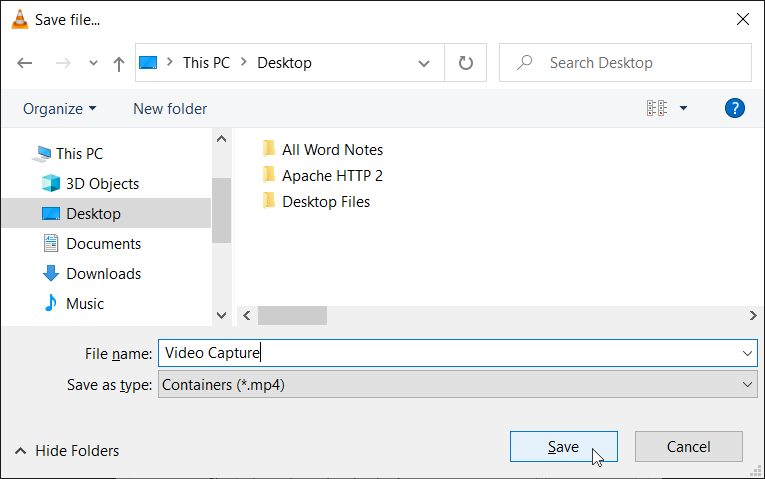
In the Save File dialog, remove any pre-populated filename and enter a new file name for the recorded video, without any file extension. Click on Desktop in the left panel, to set the file location. Click on Save.
Now, the box next to Destination File will show the full path, where the recorded video would be saved.
Step 3
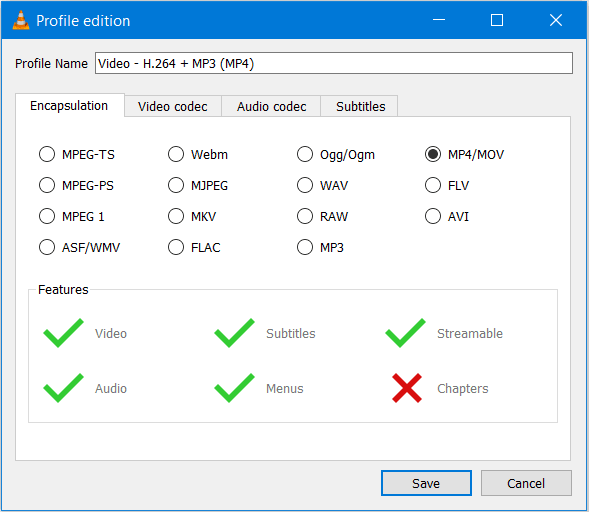
Now, we have to make some changes to the Profile Edition settings. To open the Profile Edition Settings, click on the wrench icon next to Profile drop-down box.
The Profile Edition window will open with the Encapsulation tab selected. Make sure that the MP4/MOV option is pre-selected.
Now, select the Video Codec tab and tick the Video check box and untick the Keep original video track checkbox, if it is pre-selected. This would enable all the associated tabs and settings.
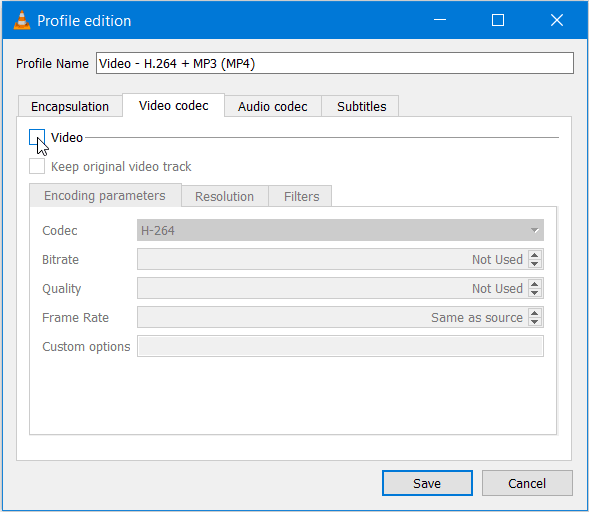
The Video codec tab has three tabs inside of it, Encapsulation parameters , Resolution and Filters. Do not make any changes in the Encoding parameters tab.
In Resolution tab click on the drop down next to Scale and select, 1 for a full-scale video. For Frame Size enter the Height and Width of the video in pixels. The boxes for entering the Height and Width may not allow you to enter text if they are set to auto; try clicking on the up arrow before entering the pixel values.
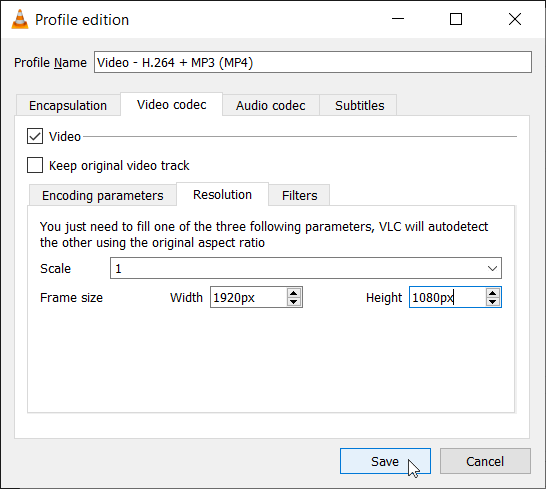
If you want a 1080p video then enter 1920px for width and 1080px for height. If you have a smaller resolution display then enter the width and height according to your display resolution.
Click on Save, to exit the Profile Edition window and to get back to the Convert Window.
In Convert window, click on the Start button to start the recording. VLC would start recording the video and the seek bar would show the elapsed time and progress of the video recording.
You can minimize VLC while it’s recording your screen. Close any unused applications or programs while it’s recording the screen.
Click on the Stop Button to stop the recording and create the video.

After clicking on stop don’t close the VLC player immediately and wait for the recorded video to appear on the desktop or the folder you specified in the destination.
How to record the Mouse pointer in the Video?
VLC player, by default, does not record the mouse pointer in the video as it requires extra processing to follow and record the position of the mouse pointer.
Moreover, you have to specify a small 20x20px PNG image file for the mouse pointer which would be superimposed on the video while recording.
Save the following PNG images to your computer and follow the steps given below, to enable the mouse pointer in the recorded video.


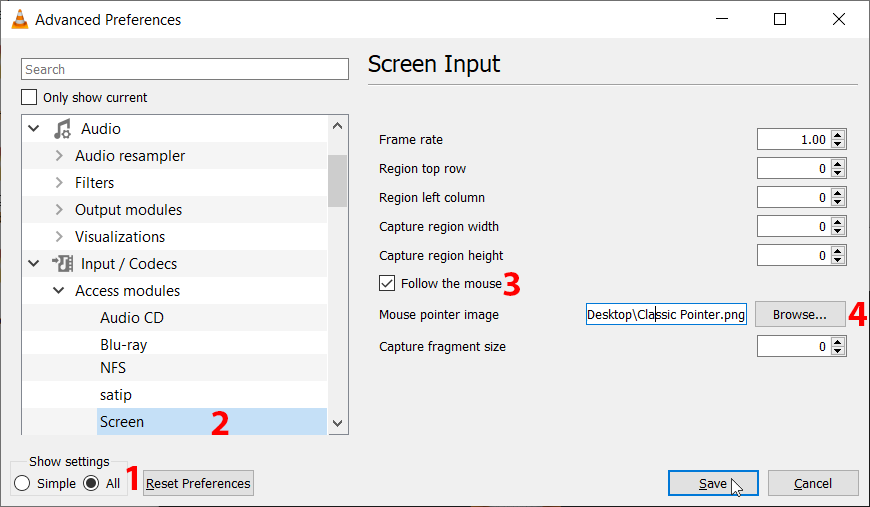
To enable mouse pointer, Go to Tools and Select Preferences. Or Press Shortcut Ctrl + P.
Next,
- Click on All radio button in the lower left corner of the Preferences window to view detailed settings.
- From the Left Side Menu, Expand Inputs / Codecs. Next, Expand Access Modules under Inputs / Codecs. Scroll down, and Select Screen.
- Check the box with, ‘Follow the mouse’ label.
- Click on Browse and select the PNG file for the mouse pointer. Click on Save.
After saving the pointer file, record your video again by following the steps given above. This time the mouse pointer would show up in the video.