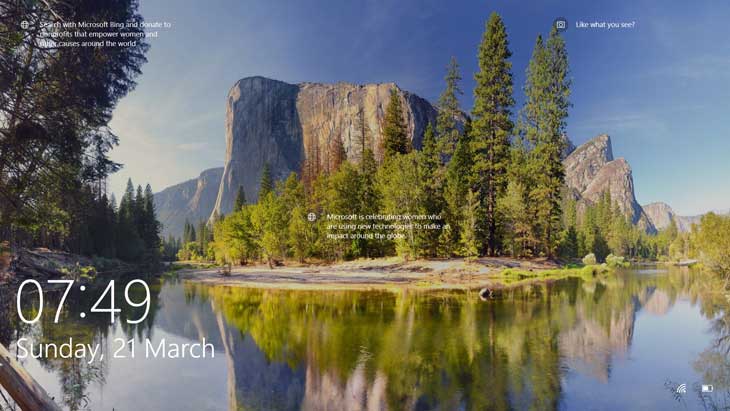
Windows 10, uses some amazing photos as background wallpapers on its login or lock screen. This feature is called Windows Spotlight and is enabled by default in Windows 10.
These photos are automatically fetched from Microsoft’s servers to be displayed on the lock screen. Microsoft uses these photos as background images on its Bing search homepage and in Windows 10 they are displayed on the login screen.
Windows 10 doesn’t give you any option to save or download these photos. If you would like to save these photos to your computer or set them as your desktop wallpaper then you would just have to find them on your PC as they are already downloaded and stored somewhere.
These photos stay on your PC for a few days before being deleted by Windows. You can copy and save the current Photo along with those of the previous few days if they are still there in the cache.
Make sure that Windows Spotlight feature is enabled in Windows 10, if you want to save or get a fresh wallpaper each day on your lock screen.
Enable Windows Spotlight Wallpapers on Lock Screen
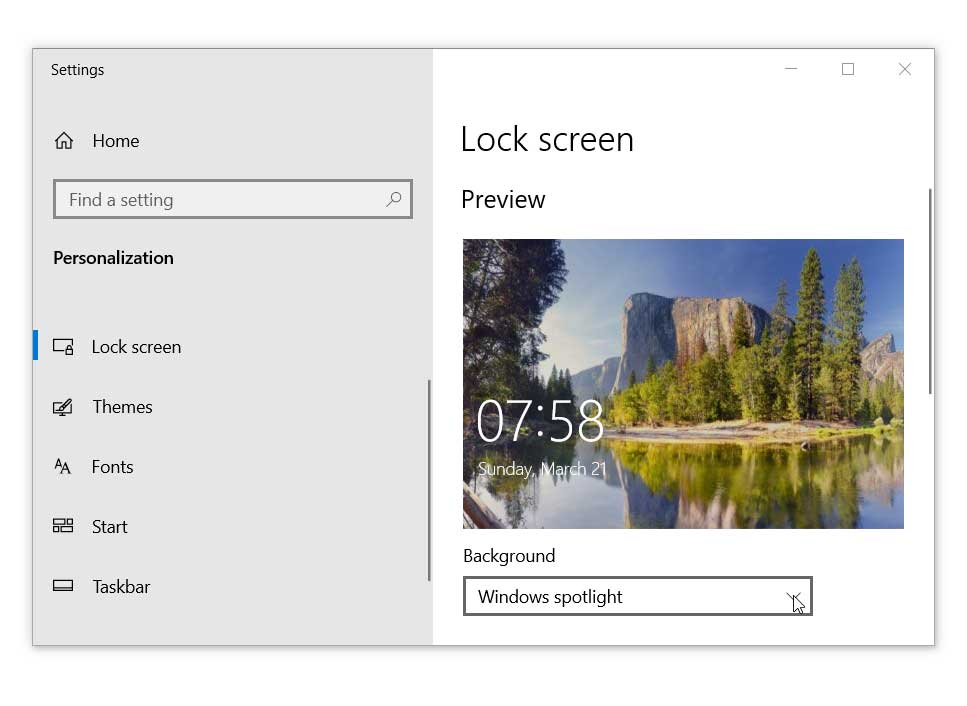
You can enable it by going to Start > Settings > Personalization. Then, click on Lock Screen, in the left panel to open its settings page. In Lock Screen settings, select Windows spotlight from the drop-down under Background.
After enabling Windows Spotlight, your PC would show you a background Photo on your Login screen which would be automatically refreshed on the next login or when you lock your PC. To save these photos, follow the steps explained below.
Save Windows Spotlight or The Lock Screen Photos
Step 1
Make sure that Show Hidden Files is enabled in the file explorer before continuing with these steps.
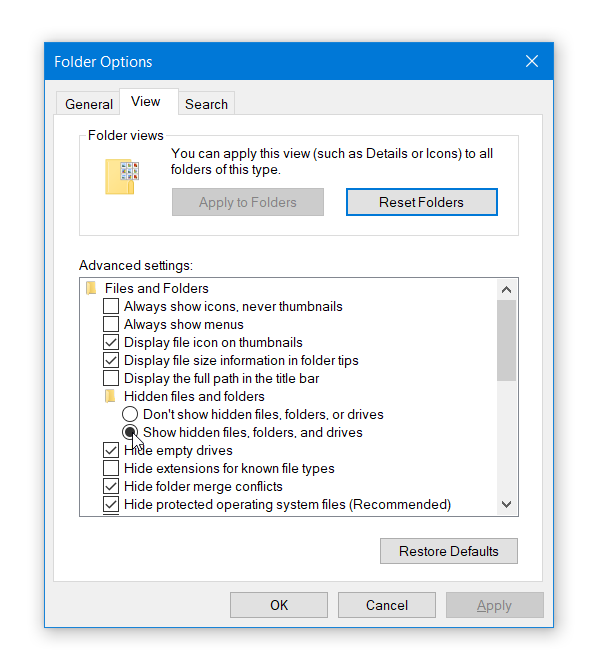
To enable Hidden Files open the File explorer and then Go to File menu and select Change Folder and Search Options. You can also press the shortcut Alt + F + O inside File Explorer to open Folder Options settings.
In Folder Options window, Go to View Tab and click on Show hidden files, folders and drives.
Step 2
After enabling hidden folder view, open the File explorer. Next, copy the path given below and paste it in the file explorer’s address bar and press Enter to open the location of the folder containing the lock screen photos.
%userprofile%\AppData\Local\Packages\Microsoft.Windows.ContentDeliveryManager_cw5n1h2txyewy\LocalState\Assets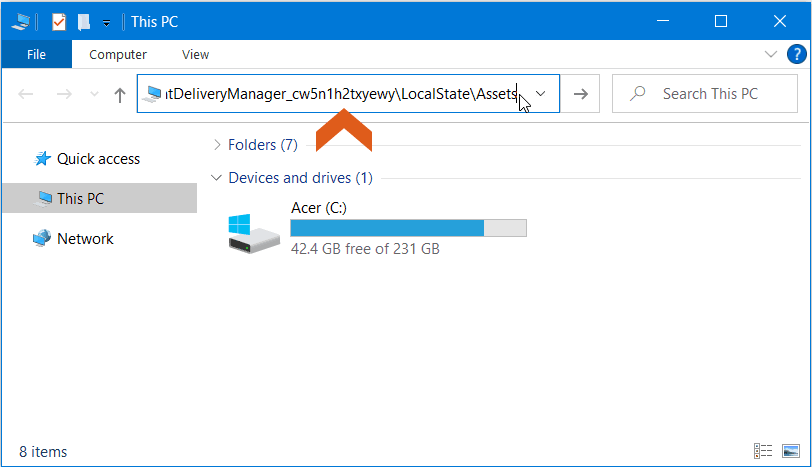
If the path given above doesn’t open the folder then, you can also find the lock screen photos folder using the following path, but make sure to replace the username with your own Windows username.
C:\Users\username\AppData\Local\Packages\Microsoft.Windows.ContentDeliveryManager_cw5n1h2txyewy\LocalState\AssetsYou have to replace the username in the above file path with your own Windows username and then paste it in the File Explorer address bar.
Step 3
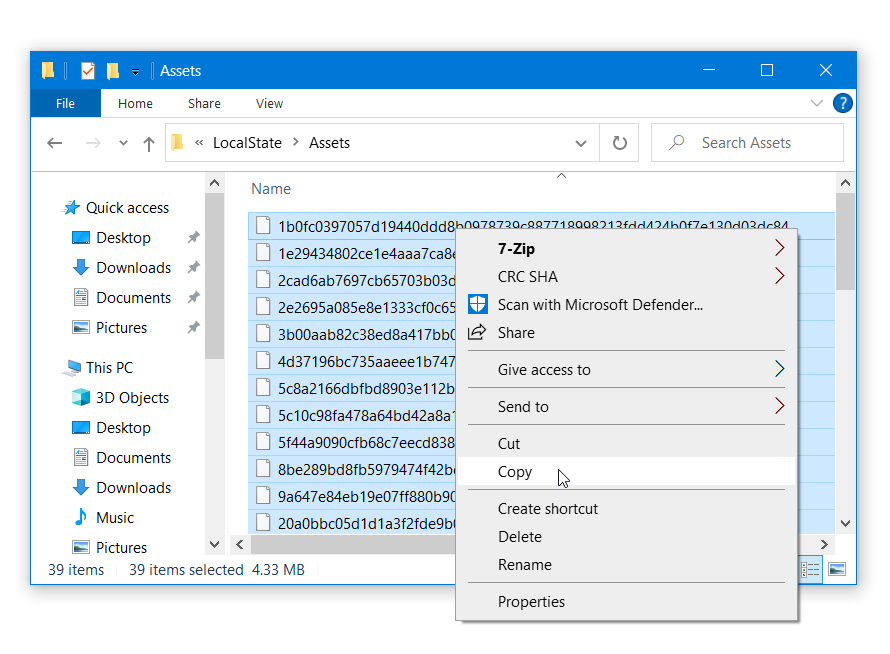
On opening this System Folder you would find some Files with no file extension and with encrypted file names. These are the image files which Windows uses on the Lock screen. They have the current lock screen wallpaper along with those of past few days. We would have to copy them to a separate folder.

Press Ctrl + A to select all the Files and then press Ctrl + C to copy all of them. But, if you use Right click > Copy for copying these files, then you may notice that Windows gives you a warning, that opening these files may be harmful.

You can safely ignore this message as we won’t be opening or making any changes to these files. We will make a separate copy of these files. So click on OK and select copy from the contextual menu to copy these files.
Step 4
Create a new folder named, Photos at any location, on your PC and paste all these files in that folder. Close the original system folder.
Open the Photos folder where you copied these files. Once inside the folder, Go to the File menu in File Explorer and select Open Windows PowerShell and then select Open Windows PowerShell as administrator.
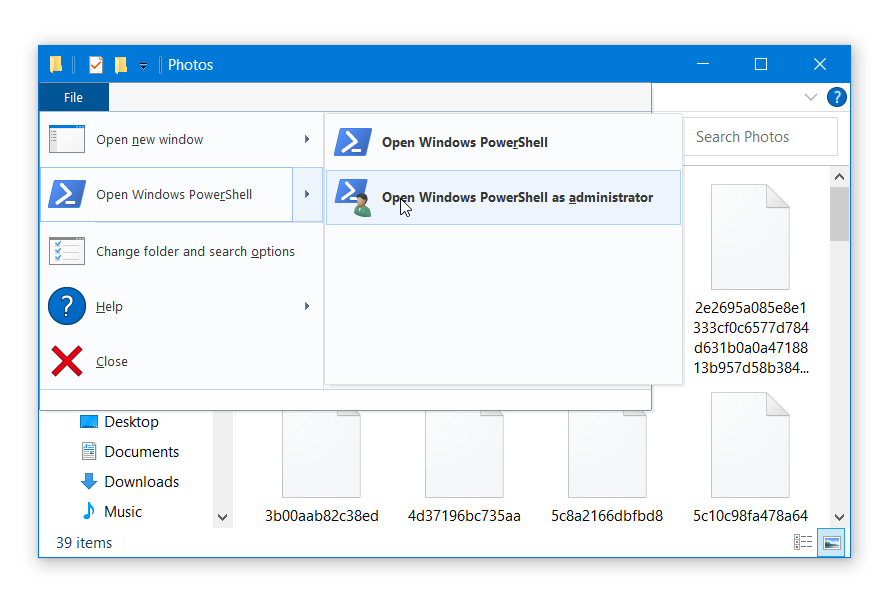
We would use PowerShell to add .jpg extension to all of these files. This would enable these files to be opened in an image viewer app and would convert them to JPG image files.
Copy and Paste the following command in the PowerShell window and press Enter. This command would add an .jpg extension to all the files in the Photos folder.
get-childitem -Path * | Rename-Item -NewName {[System.IO.Path]::ChangeExtension($_.Name, ".jpg")}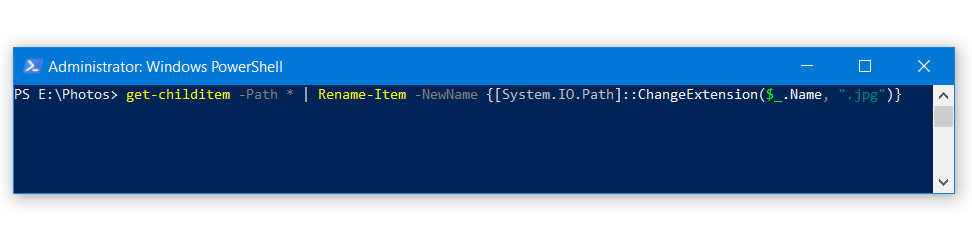
Step 5
Go back to the Photos folder. Find the photos you are looking for with the help of their thumbnail images.
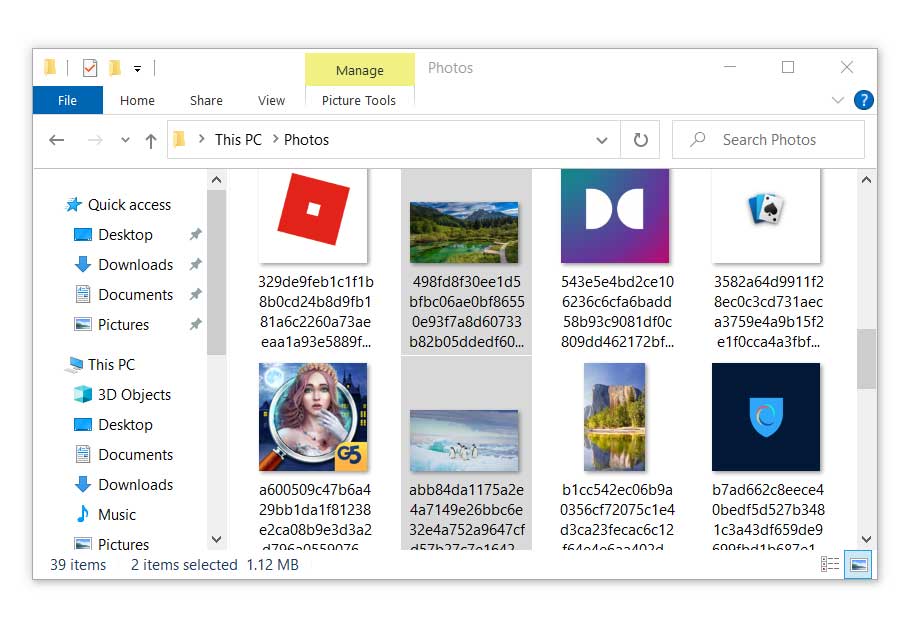
These photos may have a low resolution version of the wallpaper in the same folder. So, copy the High resolution, landscape version of the image and delete the rest of the files.