Photos is the default photo viewer app introduced with Windows 10. Microsoft added many new features to the Photos app such as the ability to edit Photos and videos.
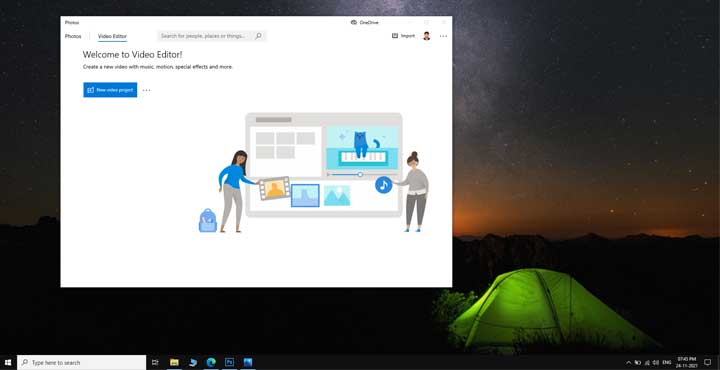
Photos app includes a basic video editor which lets you add music, text and basic motion and animation effects. In this tutorial we would be using the Photos app to add custom audio to a video file. You can also use the Photos app to remove the current audio from the video and replace it with a new audio file.
RELATED: How to Join Videos using The Photos app in Windows 10
RELATED: How to Join multiple MP3 files using Command Prompt in Windows
Photos supports most of the common video formats like MP4 and WMV and audio formats like MP3 and WAV.
Add Custom Audio to Video File using Windows 10 Video Editor
Step 1
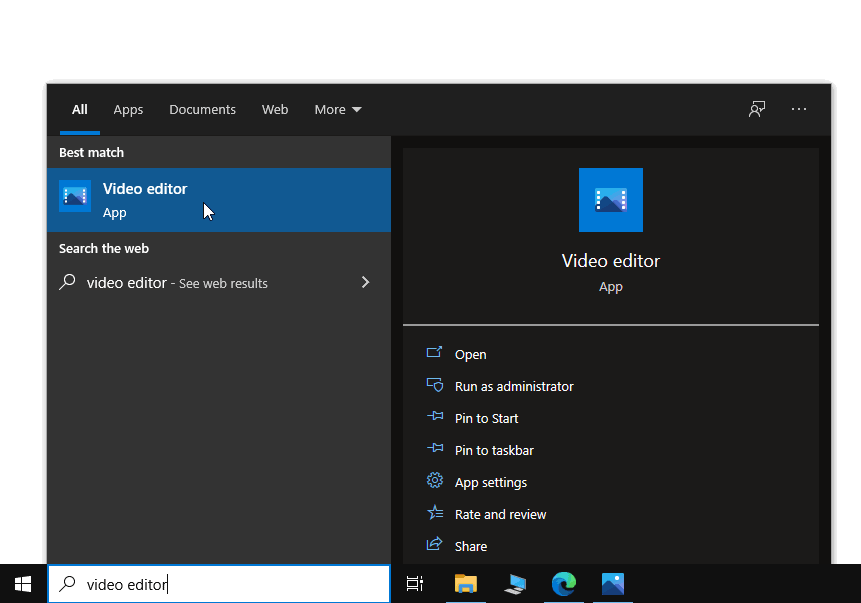
Press the Windows + S shortcut to open the Start menu search and type Video Editor in the search box. Open the Video Editor app.
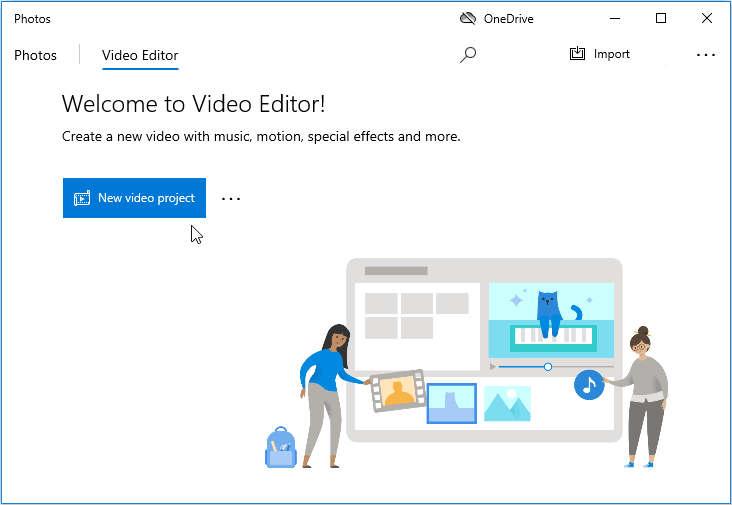
Step 2
Click on the New Video Project button.
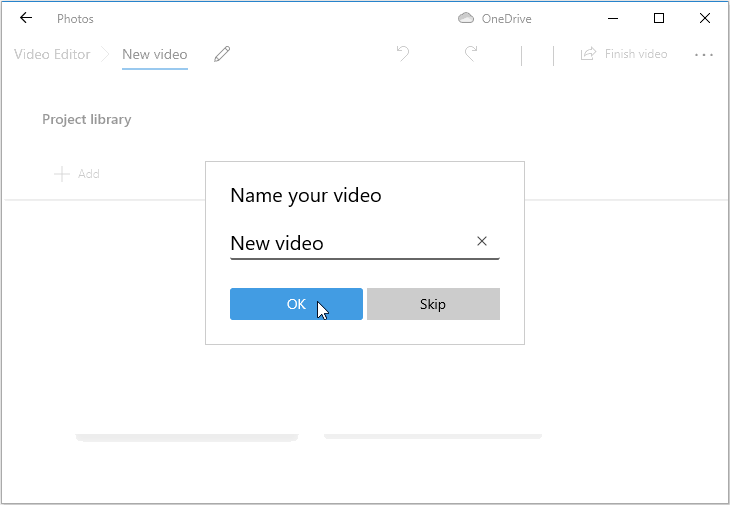
The Video Editor would ask you to enter the name for your video. Name your Video and click on OK.
Step 3
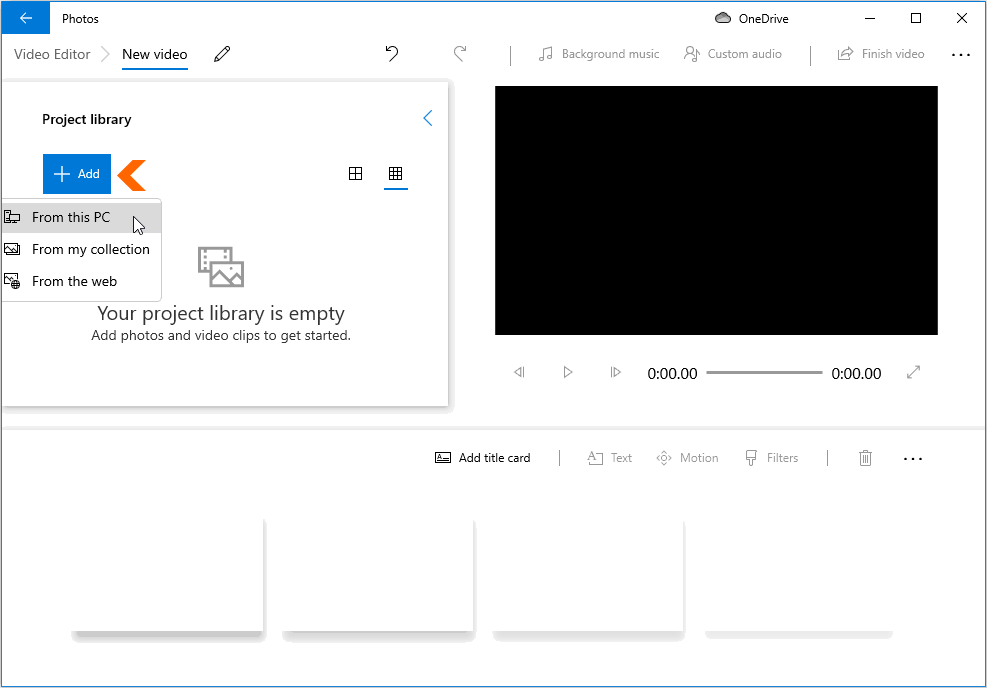
Click on the Add button in the Project Library. Select This PC and navigate to the Video File and Click on Open to add to the Project Library.
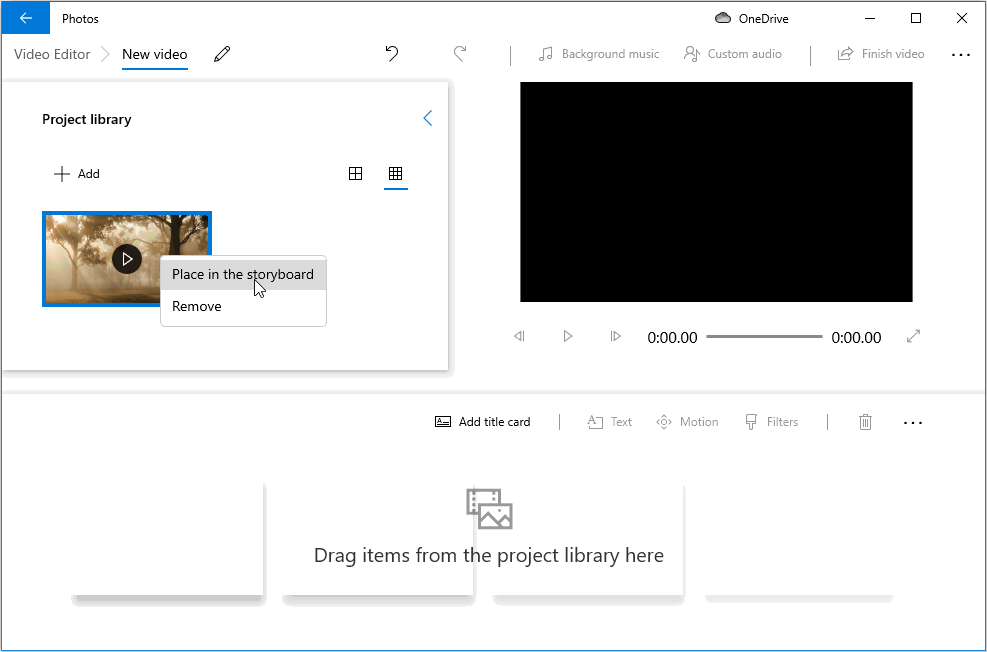
After adding the video right click on the video thumbnail and select ‘Place in the storyboard’ option.
Step 4
After placing the video in the Storyboard you can add the audio to your video file.
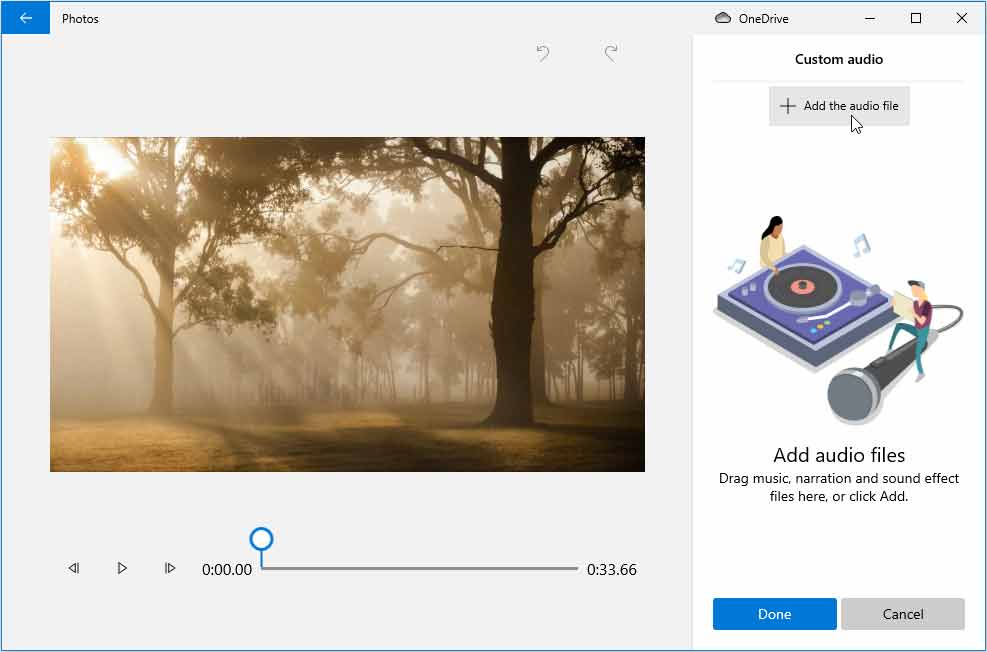
If you want to add custom Audio or narration then click on the Custom Audio Button.

On the next page click on the + Add the audio file to add the audio file to your Project.
You can drag the audio file on the seek bar to change the start time of the audio file within the video.
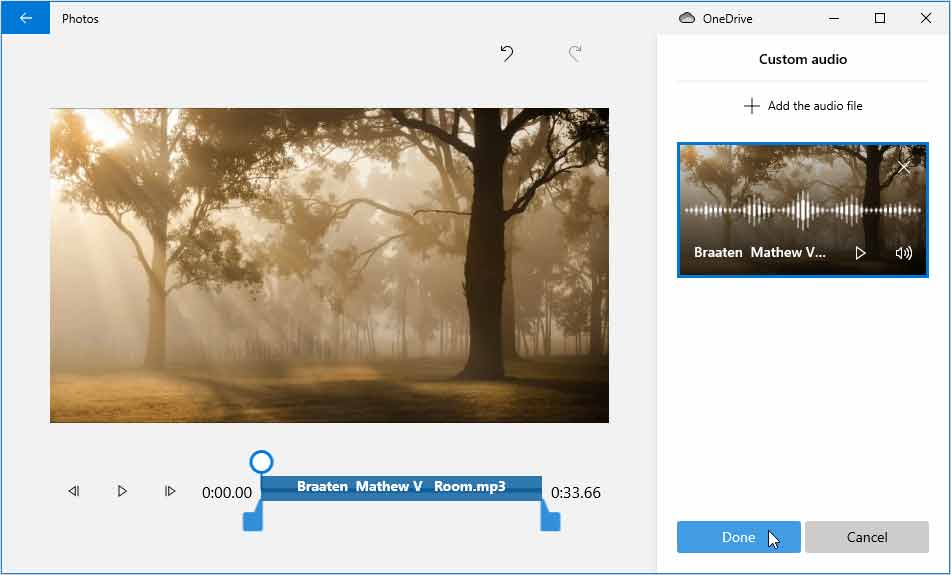
Click on Done to add it to your video.
After adding the custom audio you can change the sound level of the video’s original audio track. To change the sound level or volume of the video’s original track click on the speaker icon present on the video thumbnail.
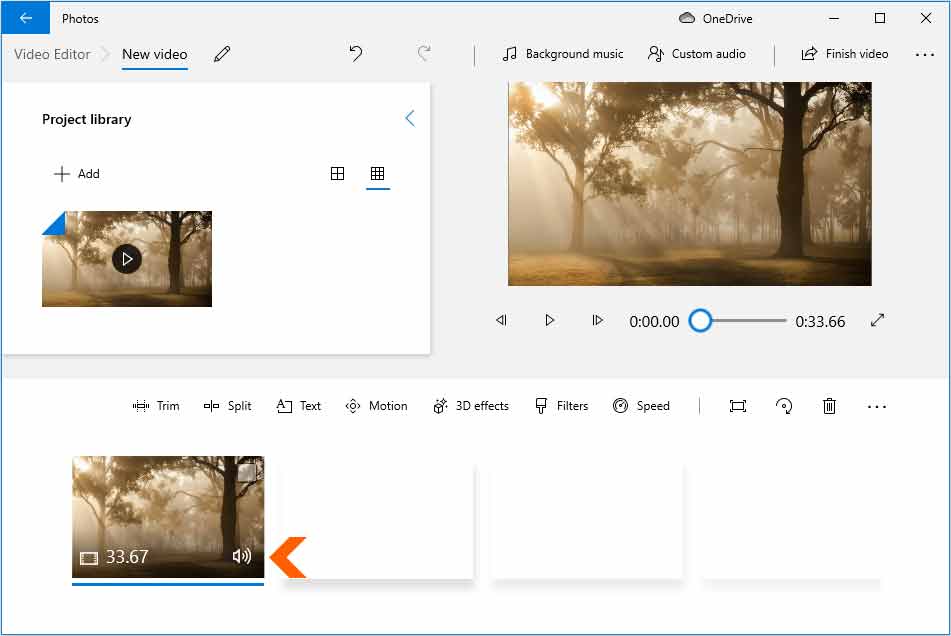
You can click the speaker icon twice to mute the original audio track of the video. This would impose your custom audio file and mute the original track in the video.
Step 5
Windows also gives you the option to add Background music to your video.
You can click on Background Music and select from one of the available Windows tracks.
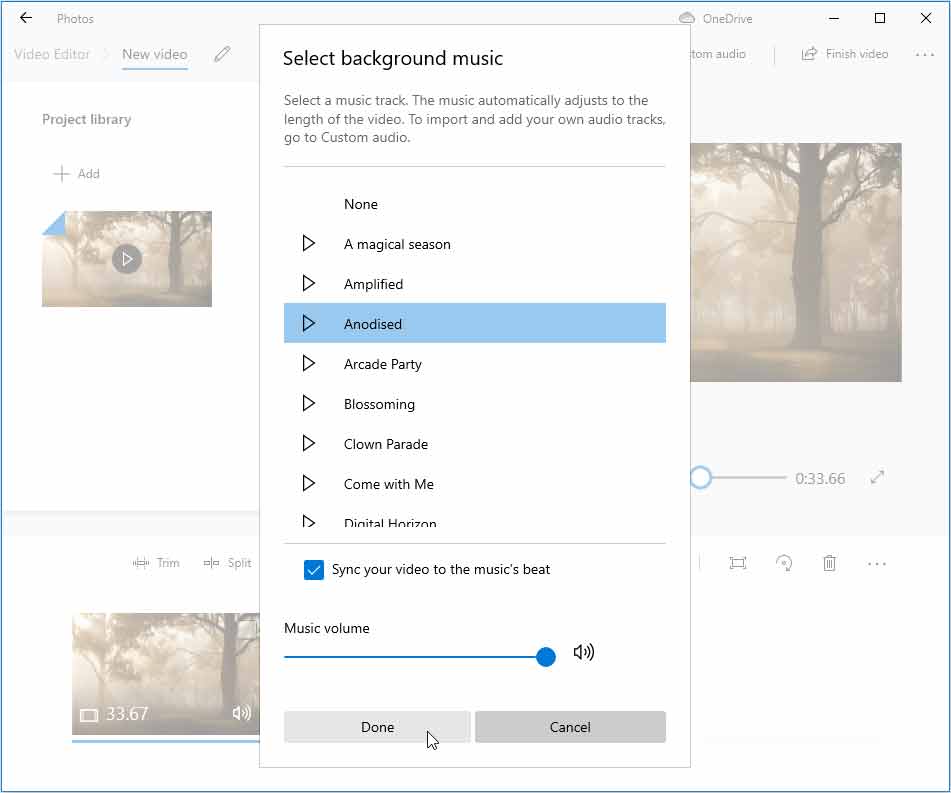
Select the checkbox labeled Sync your video to the music’s beat and click on Done.
Step 6
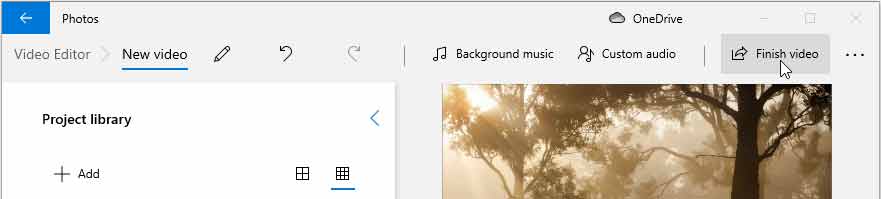
Click on the Play button to Preview your video making the changes final. Click on Finish Video if you are satisfied with the changes.
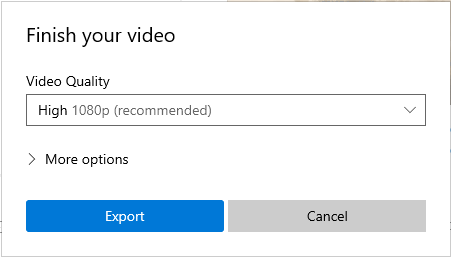
Select the video quality in the next dialog and click on the Export button to Save the video.
RELATED: How to Combine multiple MP3 files using Audacity
RELATED: How to Invert Colors of Your Photos in Windows
RELATED: How to UnSend a Sent Email in Gmail and Outlook
RELATED: How to Access your Phone’s WhatsApp from a Desktop Browser