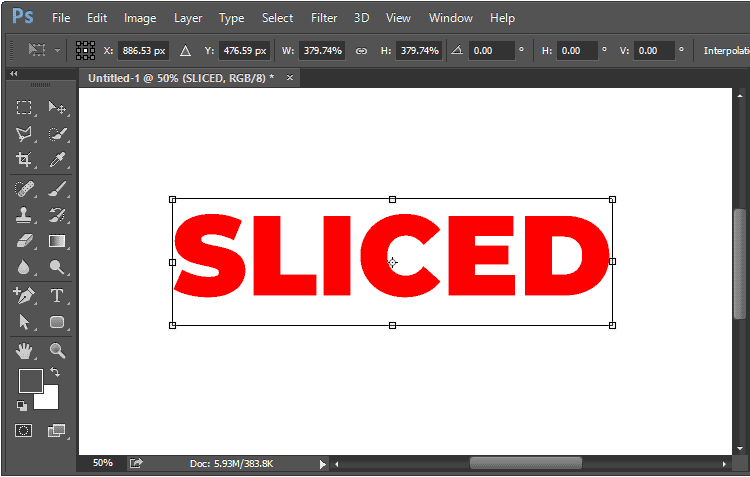
The Sliced Text is a popular typography effect used by designers to create the illusion where the text appears cut or sliced through with a sharp sword or knife.
This effect can be created in all versions of Photoshop using very few steps and is also suitable for beginners.
We would be using the vector mask method to create this effect. The text would still be readable after applying this effect. Moreover you would be able to change the text string after applying the effect.
This tutorial would work in all versions of Photoshop. Open Photoshop and follow the steps given below to create the sliced text effect.
Step 1
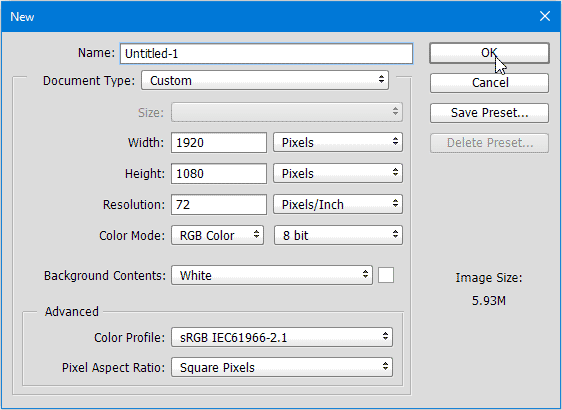
Open Photoshop and create a New Document by going to File > New. In the New dialog choose Custom for document type. Set the Width to 1920 pixels and Height to 1080 pixels and click on OK.
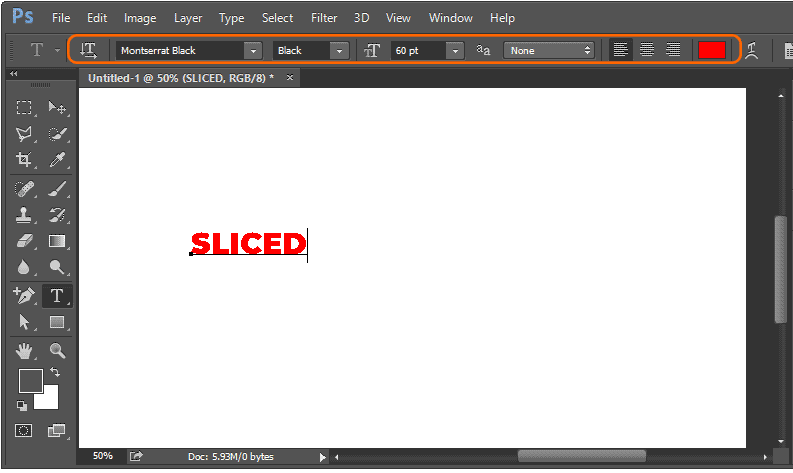
Now select the Horizontal Type Tool(T) from the toolbar and click at the center of the canvas.
Now, select the font, text color and text size from the toolbar which appears at the top.

Make sure that the font you select is appropriate for this effect. Black and Bold variants of fonts with more width work best for this effect.
We would be using the Montserrat Font’s Black variant, which is available for free download on Google Fonts. You can download the entire Montserrat Font family from the following link.
Now, Type the text you want to use for creating this effect. Press Ctrl + Enter after entering the text.
You can change the color of the text by double clicking on the Text layer in the Layers Panel (Press F7 if it’s not visible) and then choosing the color from the toolbar at the top.
Step 2
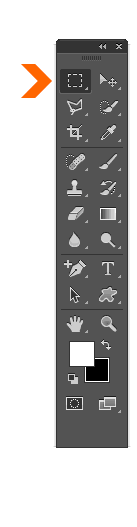
Resize the text layer to make it bigger. To resize it, select the Rectangular Marquee Tool (M) in the toolbar.
Right click on the text and select Free Transform. This will show the anchor points for resizing the text.
Press and Hold the Shift key and drag the anchor point at the lower right corner to resize the text to the desired size and then press Enter to confirm.
Position the text in the middle of the canvas using the Move Tool (V).
Step 3
Make sure that the text layer is selected in the Layers Panel and then click on the small dropdown in the top right corner of the Layers panel.
Select Convert to Smart Object from the contextual menu that appears.
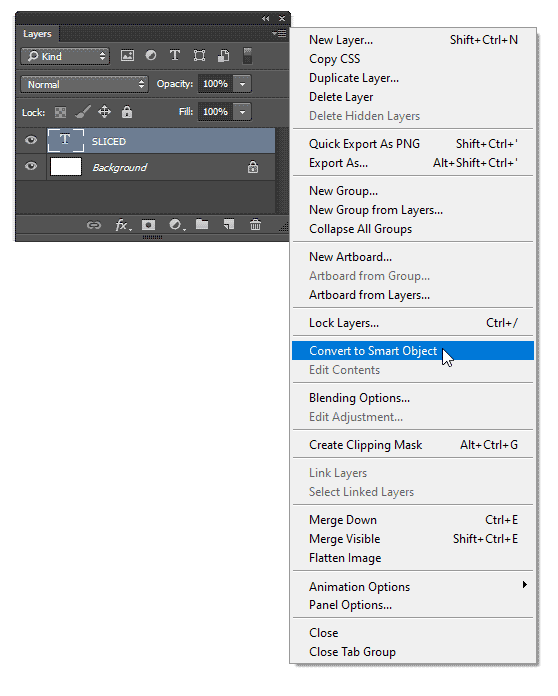
This will convert the text layer to a smart object, which means; you would be able to make changes to the text later on and its layer will still retain all the effects which were previously applied.
When converted to a smart object; a small icon would appear on the Layer thumbnail in the Layers panel.
Step 4
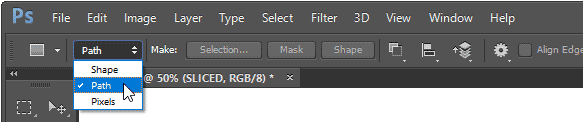
Now, select the Rectangle Tool (U) from the toolbar.
Its Options Bar would appear at the top when you select the Rectangle Tool (U). Click on the second drop down and select Path.
Now, we would draw the rectangle which will be used to slice the text into two. Create the rectangle such that it covers the lower half of the text, horizontally.
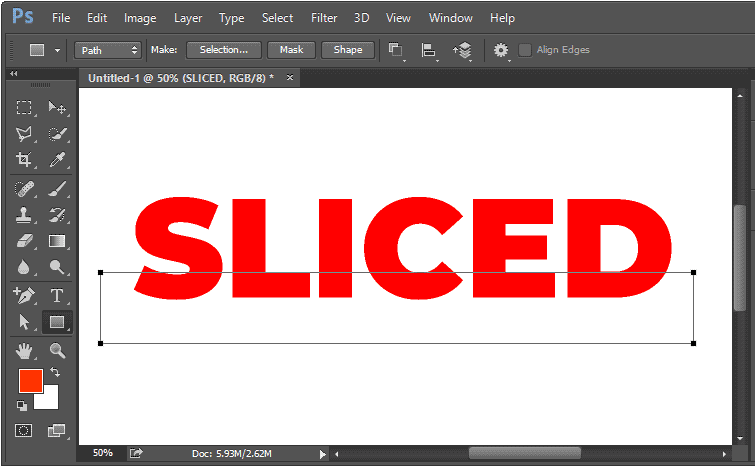
Now, we would make the top edge of this rectangle diagonal for creating the blade cut or slice effect.
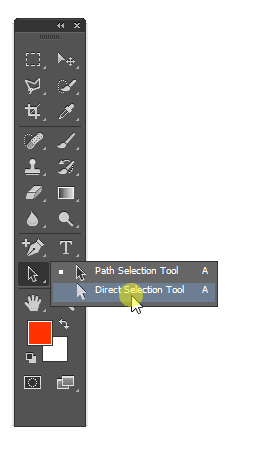
To do that, select the Direct selection tool (A) in the toolbar. The Direct Selection Tool (A) would be hidden under the Path Selection Tool (A) in the toolbar. To access it, you would have to click and hold your mouse button on the Path selection tool for 2 seconds and then select it.
Now, with the Direct Selection tool selected, click anywhere (except for the rectangle) on the canvas to deselect the rectangle, making its anchor points at the corners disappear.
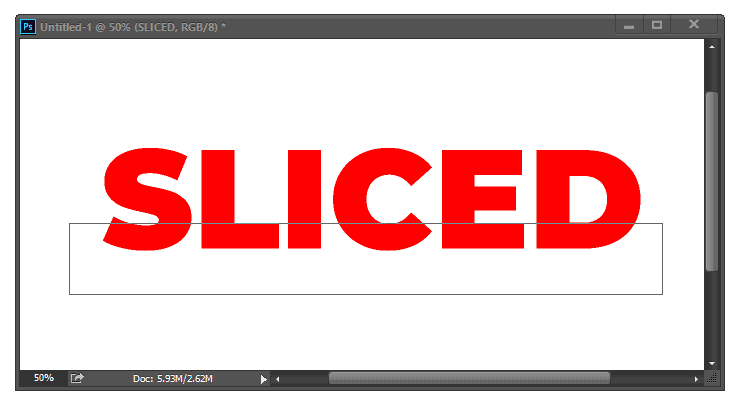
Then press and hold the Shift key on the keyboard and click on the top right corner of the rectangle and drag the anchor point to move it slightly upwards.
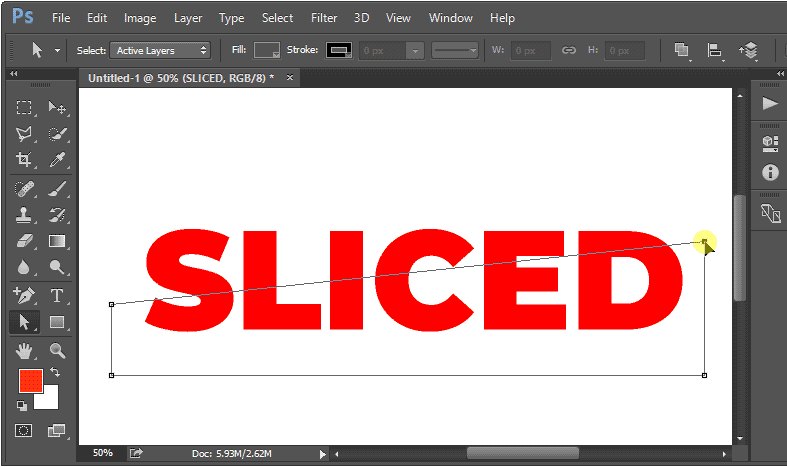
Photoshop would show an alert message when you release the mouse button, telling you that the rectangle shape would be converted to a regular path.
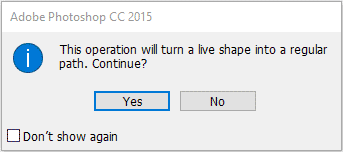
Click on Yes to Confirm.
Step 5
We have created the path for dividing or slicing the text. We would now create a vector mask using this path to hide the portion of the text layer contained within its area.
To do that, make sure that the text layer is selected in the Layers Panel and the Rectangle shape is selected with its anchor points at the corners visible. Select it with the Direct Selection Tool (A) if the anchor points at the corners are not visible.
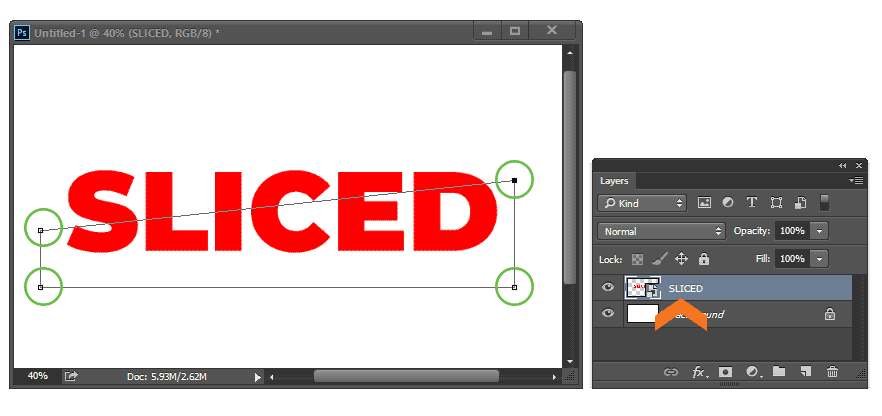
Then, press and hold the Ctrl key on the keyboard and click on the Add Layer mask icon located at the bottom of the Layers panel.
This would divide the text and only the lower portion of the text would be visible.

Step 6
We would now duplicate the layer which we created in the previous step to create the upper half of the sliced text.
To duplicate the layer, press Ctrl + J shortcut after selecting the text layer in the Layers Panel.
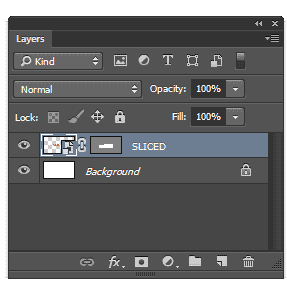
This would create a duplicate layer copy.
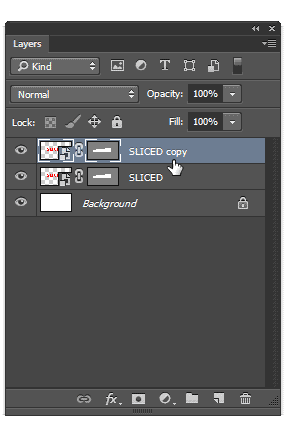
Now we have to invert the vector mask on the duplicate layer, making the top part of the text visible and hiding the lower part.
To do that select the duplicate layer in the Layers Panel.
Then, select the Rectangle tool in the toolbar.

Now, go to the Options bar at the top and click on the Path Operations icon and select the Subtract Front Shape option.
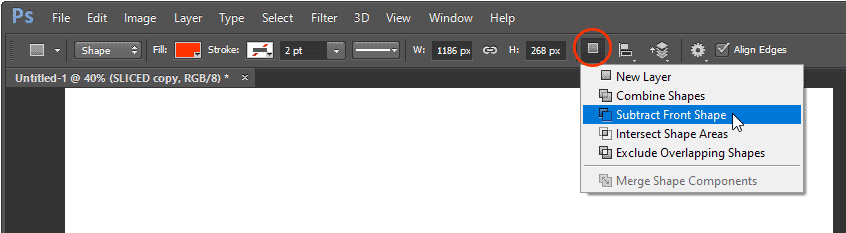
This would invert the vector mask making the top portion of the text visible. Now, we have two layers of the text which can be separated to create the sliced text effect.
Step 7
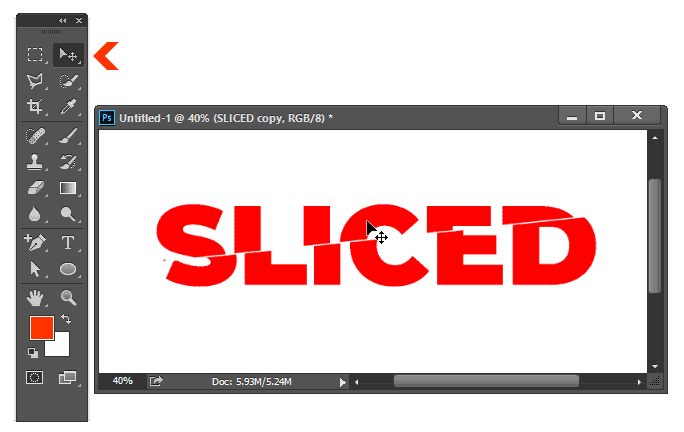
Select the Move Tool(V) in the toolbar and nudge the text in the top layer slightly to the left, as if it’s sliding on the bottom text layer.
This is your final sliced text effect. You can also add shadows to the top layer to make it more realistic. To add shadows double click on the Text copy layer in the Layers Panel and select Drop shadow.
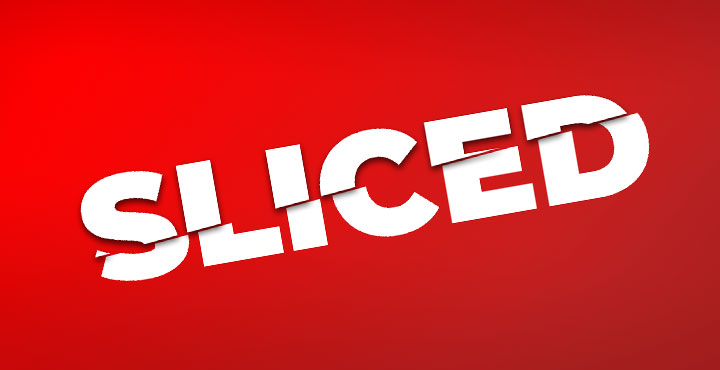
You can add a background layer with a color gradient to make the text layer more prominent.
Moreover, you can also change the text by double clicking on the Layer thumbnail in the Layers panel. It would open the text layer in a new window within Photoshop where you can apply a different color or change the text. You would have to do it for both the original and its duplicate layer.
Photoshop would then ask you to save the changes when you’re done editing and close the window. Those changes would be applied to your original document.