Want to cut out or crop images in the shape of letters? There are many ways of doing this in Photoshop and it is one of the most basic text effects, even beginners with no previous experience in Photoshop can carry out.
This tutorial would work in all versions of Photoshop and we would be using the basic Clipping mask method for creating this effect.
Open your image using Photoshop and follow the steps given below.
RELATED: How to Invert Colors of Your Photos in Windows
Step 1
Open the image in Photoshop, by right clicking the image file and selecting Open With > Photoshop. Alternatively, you can drag & drop the image file into the Photoshop app.
Step 2
After opening the image, Duplicate the Image Background layer using the Layers panel. If the Layers panel is not visible then you can press the F7 key to activate it, or you can activate it by going to Photoshop’s Window menu and selecting Layers.
To duplicate the Background image layer, go to Layer > New > Layer Via Copy. Alternatively, you can also press the Ctrl + J shortcut to duplicate the layer.
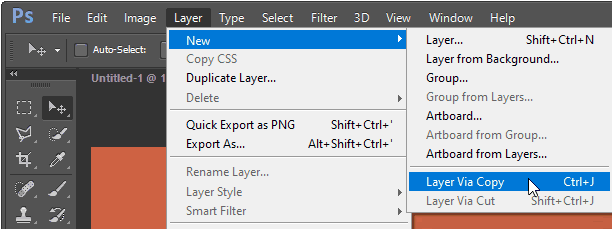
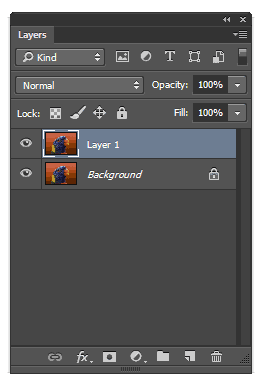
Photoshop would create a copy of the background layer titled Layer 1, positioned on top of the Background layer.
Step 3
Now go to the Layers panel and click on the New Fill or Adjustment layer icon.

Select the Solid Color option from the contextual menu which appears.
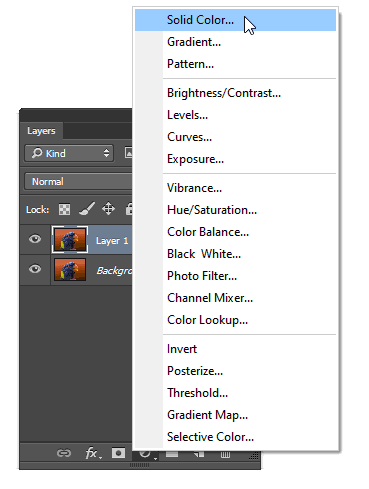
This will create a new Fill layer and also open the Color Picker to choose the color for the new Fill layer.
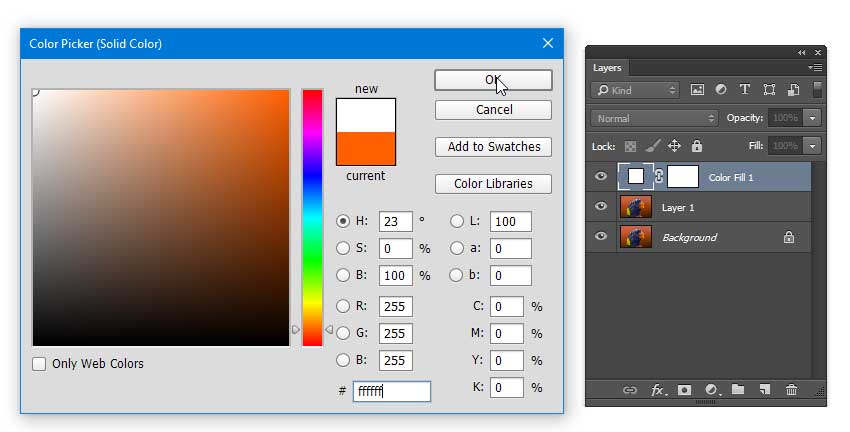
Choose the white color by either selecting it with your mouse or by typing the hex color code ffffff in the text box at the bottom and click on OK.
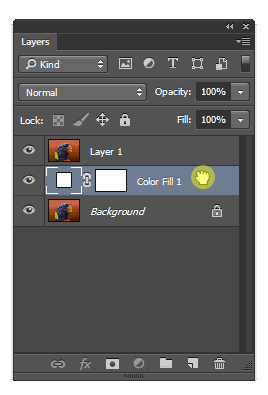
After creating this Color Fill layer move it below Layer 1 in the Layers Panel by selecting and dragging it with your mouse.
Step 4
Now, select Layer 1 in the Layers panel by clicking on it.
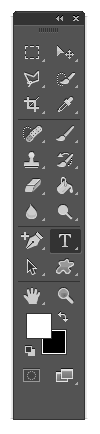
Then, click on the Horizontal Type Tool (T) in the toolbar on the left.
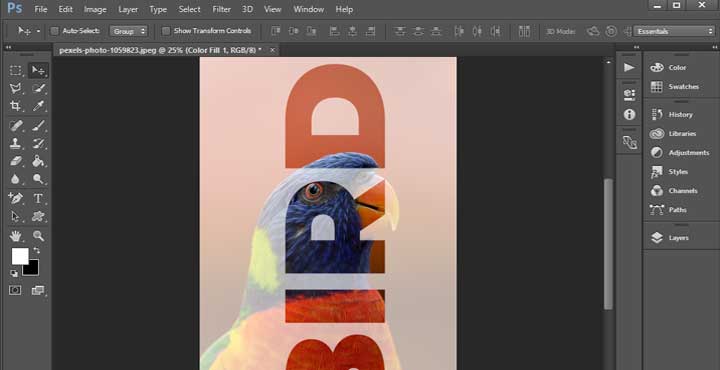
With the type tool selected, click near the left edge of your image and type the text you want to use for cropping the image. Select the font for your text from the top toolbar.
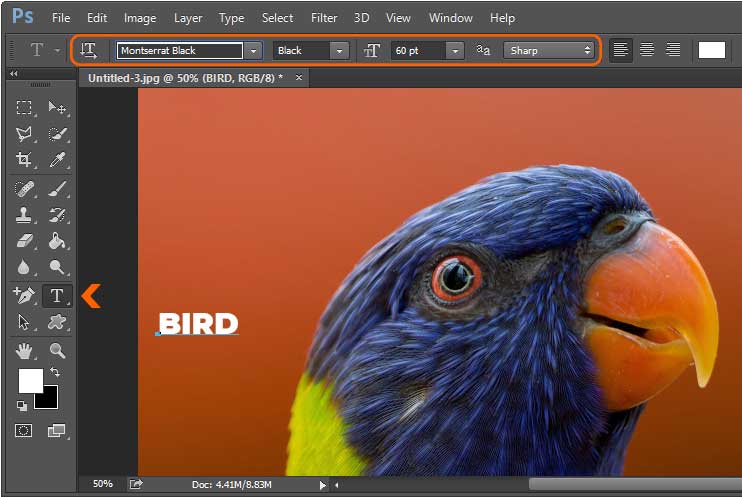
You have to ensure that the font you select for the text is right for creating this effect. Bold and Black variants with more thickness and width work best for this effect.
We used the Montserrat font’s Black variant, which is free to download on Google Fonts. You can download the entire Montserrat family from the following link.
After typing the text, click on the Rectangular Marquee tool (M) in the toolbar.
Make sure that the Text layer you created, is selected in the Layers Panel. Then right click on the text and select Free Transform from the contextual menu that appears.
Press and hold the Shift key on the keyboard and then resize it by selecting and dragging the bottom right corner or anchor point.
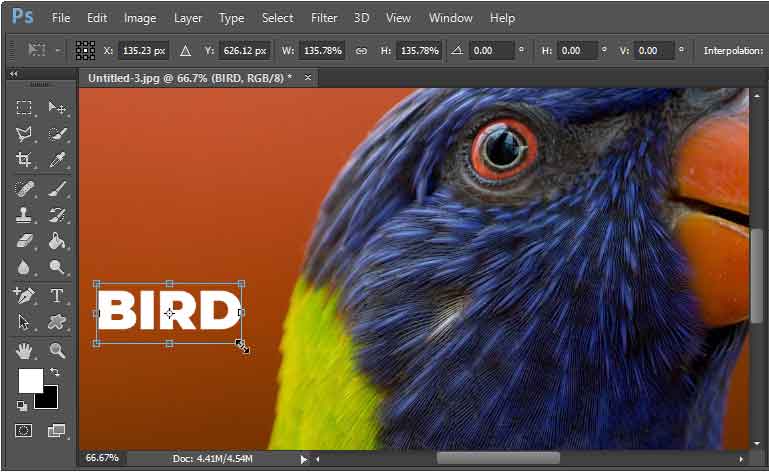
Resize it to the desired level and press Enter to confirm. You can reposition the text within the image using the Move Tool (V).
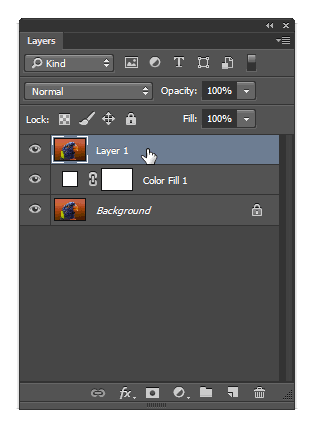
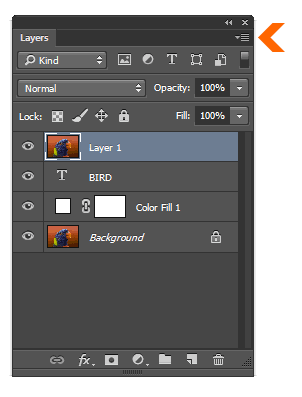
Step 5
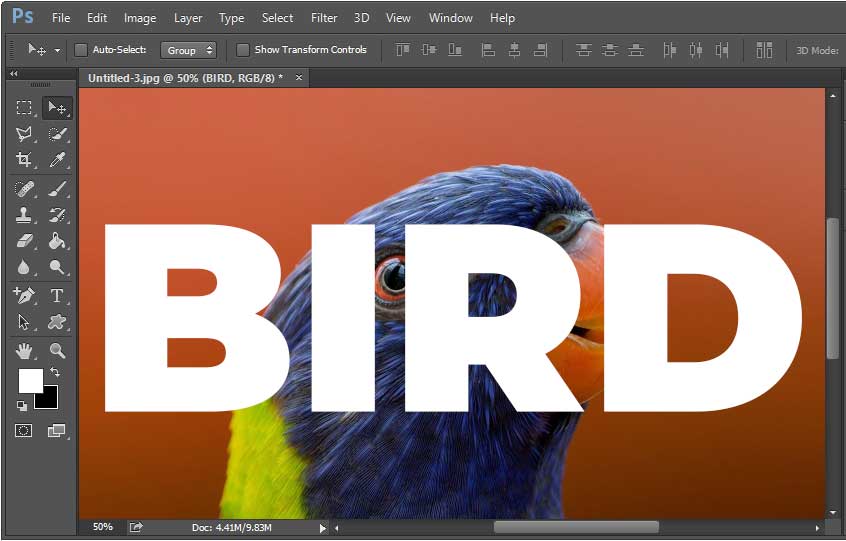
After creating the text layer go back to the Layers panel and move the Text layer exactly below Layer 1 or the image layer.
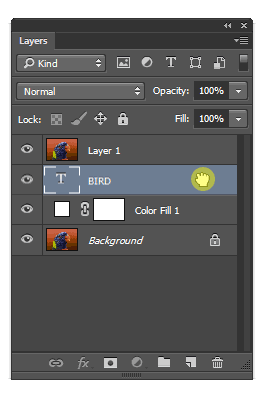
This will hide the Text Layer below Layer 1 and it won’t be visible on screen.
Step 6
Select Layer 1 and then click on the small drop down icon in the top right corner of the Layers panel.
Choose Create Clipping Mask from the menu which appears. This will crop the image and create the final text effect.

This would crop your image in the shape of the text and only the area within the text’s letters would be visible.
Save the image
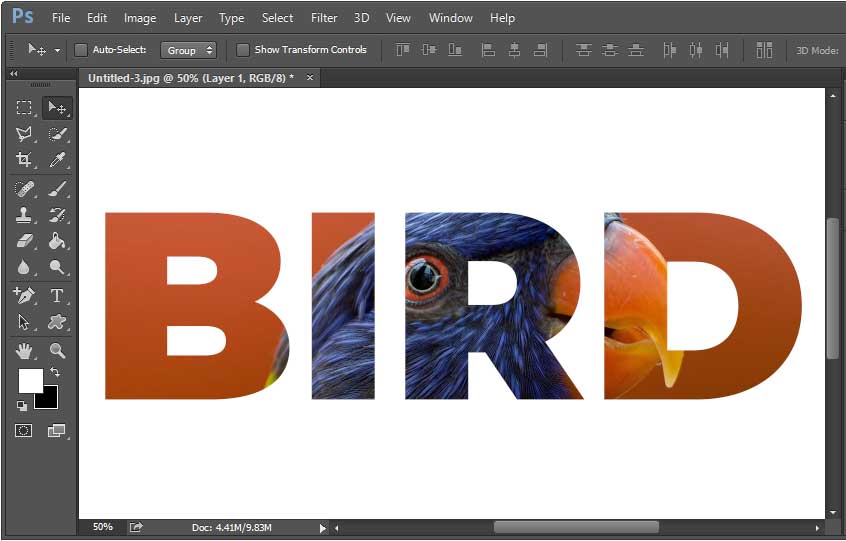
This is your Final image. You can save this image in the JPG format. To save the image go to the File menu and select the Save As… option. In the Save As dialog click on the Save as Type dropdown and select the JPEG(*.JPG;*.JPEG;*.JPE) option. Select the File location and click on Save button to save the image.
RELATED: How to identify the Font used on a Website
RELATED: How to Estimate the Life Span of your SSD storage
RELATED: How to Reduce Blue Light Using Night Light in Windows 10
RELATED: How to set Alarms and Timers in Windows 10
RELATED: How to configure Multi-touch Touchpad Gestures in Windows 10
RELATED: Read aloud Webpages in Android using Google Assistant