
Rotating an object around a circle or a reference point in Adobe Illustrator without using the rotate tool is a difficult task to accomplish. Most beginners in Illustrator, at some point in their learning curve have to discover or learn to use the rotate tool. It’s one of those indispensable tools which you will need if you want to place objects around a circle or around a central reference point, like the spokes of a wheel.
Doing this without using the rotate tool is very difficult and you would never get perfect results. Rotate tool on the other hand would help you to get accurate and precise placement of the objects.
Rotate tool can either rotate an object on its own central point or around a different reference point selected by you. The two animated images below would better explain the difference between the two rotation methods.
Steps to Rotate an Object Around its Own Central Point
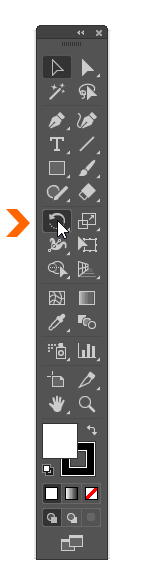
To rotate an object around it own center point, simply select it with the Selection Tool (V) and then Double click the Rotate Tool (R) in the toolbar. If the Rotate tool is not visible on the Toolbar then you can press R on the keyboard to enable it and then double click it in the toolbar.
This would open the Rotate Tool Dialog Box. In the dialog Box enter the value for the angle (let’s say 30°) and then select Copy . ( Don’t click on OK as doing so would rotate the object itself instead of creating it’s duplicate copy).
This would create a duplicate copy of the object which would be rotated counter-clockwise by the angle of 30°. You can repetitively, press Ctrl+ D on Windows or Cmd + D on Mac to create more duplicate copies of that object, rotated at the given angle.
Steps to Rotate and Duplicate an Object around a Reference point by the Given Angle
The following steps would teach you to use the rotate tool to duplicate objects or shapes around a central reference point like the hour and minute markings on a watch dial.
We would use the Rotate tool to create a dial of a clock and place the hour and minute markings after a specific angle or interval.
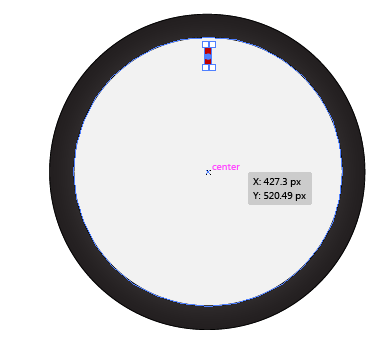
Select the Ellipse Tool (L) and create a perfect circle by pressing and holding Shift key and give it a dark color. Create another smaller circle in white and place it inside the bigger circle, such that their centers intersect with each other.
Now, Create a red rectangle for the hour markings and place it at the 12th hour position such that its center is aligned with the center of the dial’s circle.
Now, We would use the rotate tool to duplicate and place the marking after an interval of 30°.
Choosing the right value for the angle is one the most important step in using the rotate tool. To calculate the value for the angle you have to keep in mind that it can only be a value between 0° and 360°. But, how do you calculate the value for the angle?
In our example, we are creating a watch so, we would have to create twelve, such hour markings. We would get the angle by dividing 360° by 12 which would give us a value of 30 degrees ( 360÷12 = 30 ).
Similarly, if we want to calculate the angle for the minute markings we would divide 360° by 60 which would give us an angle of 6°.
Select the red rectangle or the hour marking with the Selection tool (V) and then click on the Rotate tool (R) in the toolbar.
Now, Press and hold the Alt key and Click at the center of the inner circle of the dial.

Clicking at the reference point opens the Rotate Dialog box. In the Rotate Dialog enter the value for the angle as 30°.
Now, Click on Copy (Don’t click on OK), to create a duplicate copy of the object which would appear in the counter-clockwise direction at 30 degree angle. Press Ctrl+D on windows and Cmd+D on Mac to create more markings and to duplicate the shape.
You can repeat the same process to create the markings for the minute hand. But put the angle as 6° for creating the minute markings. If you have followed the steps correctly , then your finished artwork should look like this.

RELATED: Splitting shapes into Rows and Columns in Illustrator
RELATED: How to use the Mesh Tool to Create Gradients in Illustrator
RELATED: Draw Shapes in Illustrator with the Shaper Tool
RELATED: Create or Merge shapes using Shape Builder tool in Illustrator
RELATED: How to Cut and Trim Objects in Illustrator using Pathfinder